This taro bread has a light and fluffy milk bread base swirled with a lightly sweetened taro filling. Change up your regular loaf with this beautiful taro bread for a nice weekend breakfast, or make it as a special edible gift. {Vegetarian}
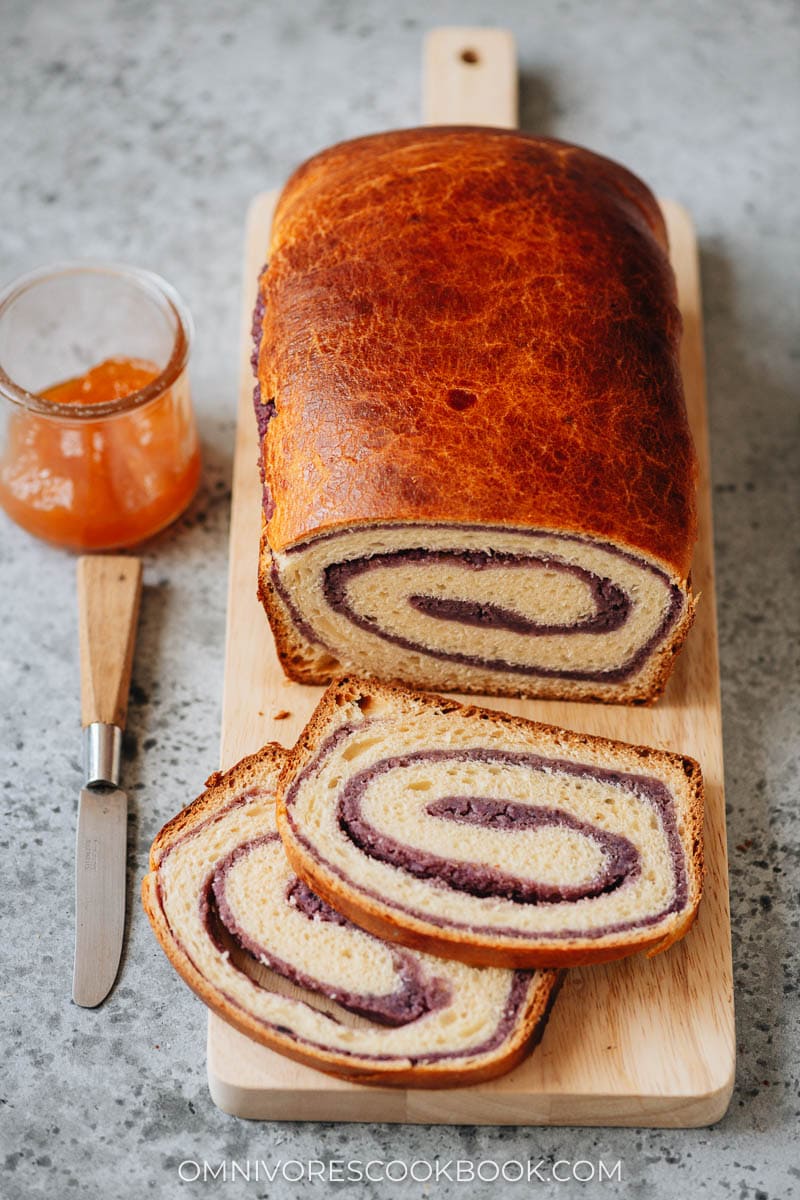
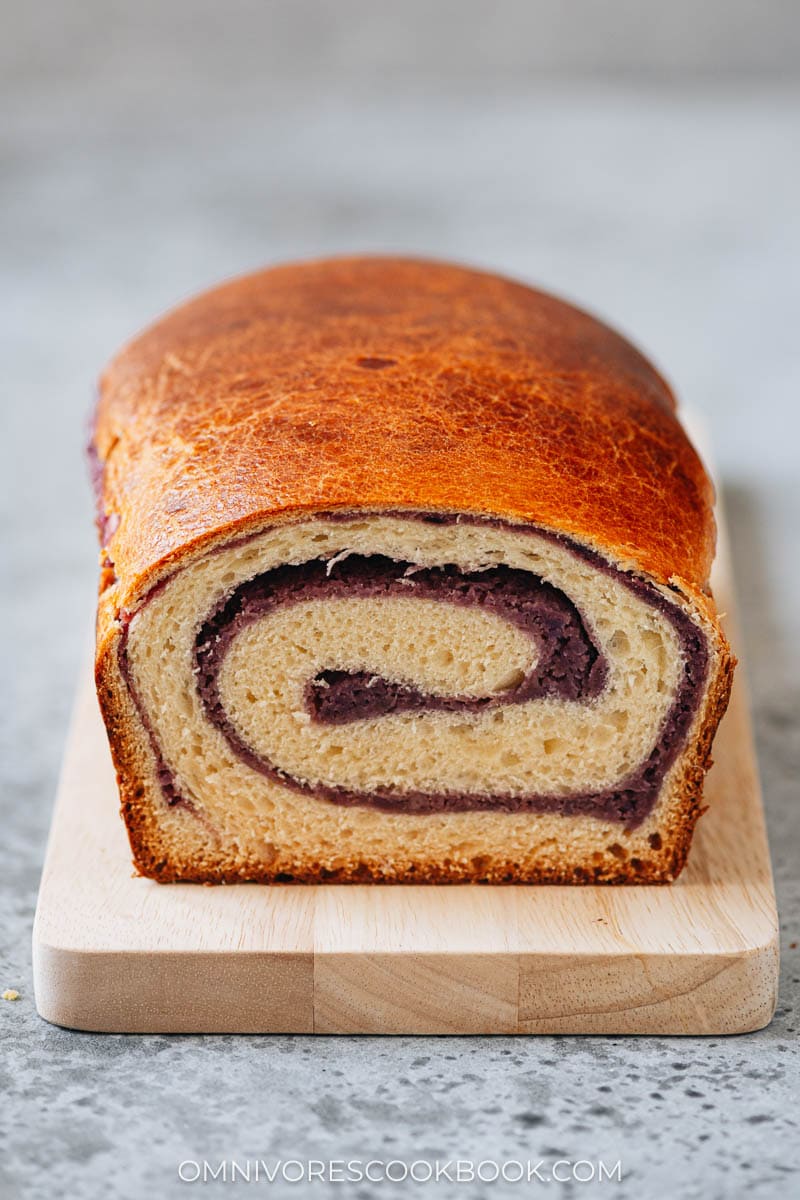
You might have seen sweet taro bread at an Asian bakery. Sometimes they are made into dinner rollsand sometimes the taro filling is baked into a loaf of bread. Today I want to share this beautiful swirled taro bread that uses a very simple milk bread dough. You can easily put the bread dough together using a mixer. The filling is made with taro and purple sweet potato to add color, then sweetened with condensed milk and sugar. The whole loaf is very fluffy and tender, and just slightly sweet. It can be served by itself or with butter and jam for a fun breakfast.
Ingredients
Taro
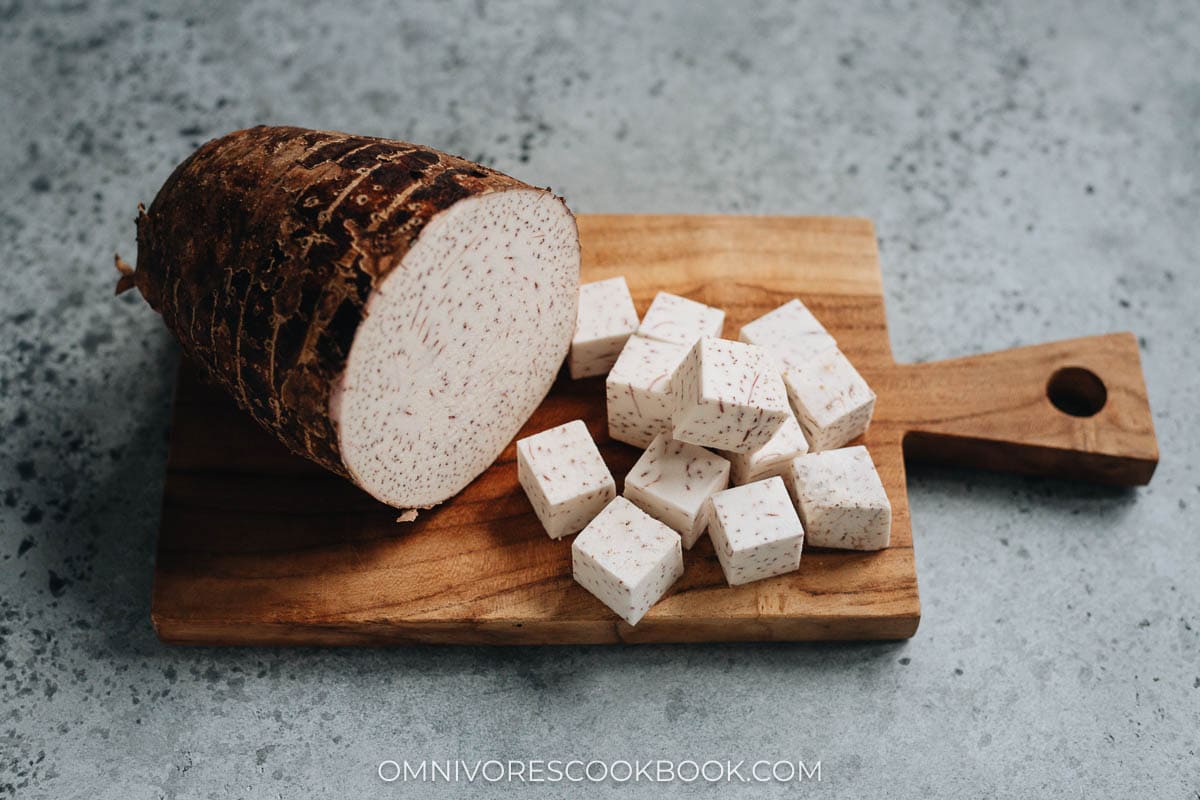
Taro, or taro root, is called Yu Tou (芋头) in Chinese. It is a root vegetable, similar to potato and sweet potato. It has a fuzzy brown exterior and speckled cream colored interior with a hint of purple. Once cooked, it has a light sweet taste with a hint of savory umami. It is a very popular ingredient to be used in Asian desserts, such as ice cream, bread and cake.
You can find taro in Chinese markets and most Asian grocery stores. When you shop for taro, you might see smaller ones like potatoes or huge roots that are the size of a head of cabbage. For a bigger taro root, you will often find the ones that are cut up and sold in sections.
If you have leftover taro after making this recipe, you can steam it until tender and dip it in sugar to enjoy directly. It is also a nice ingredient to add to a savory soup, to replace potato.
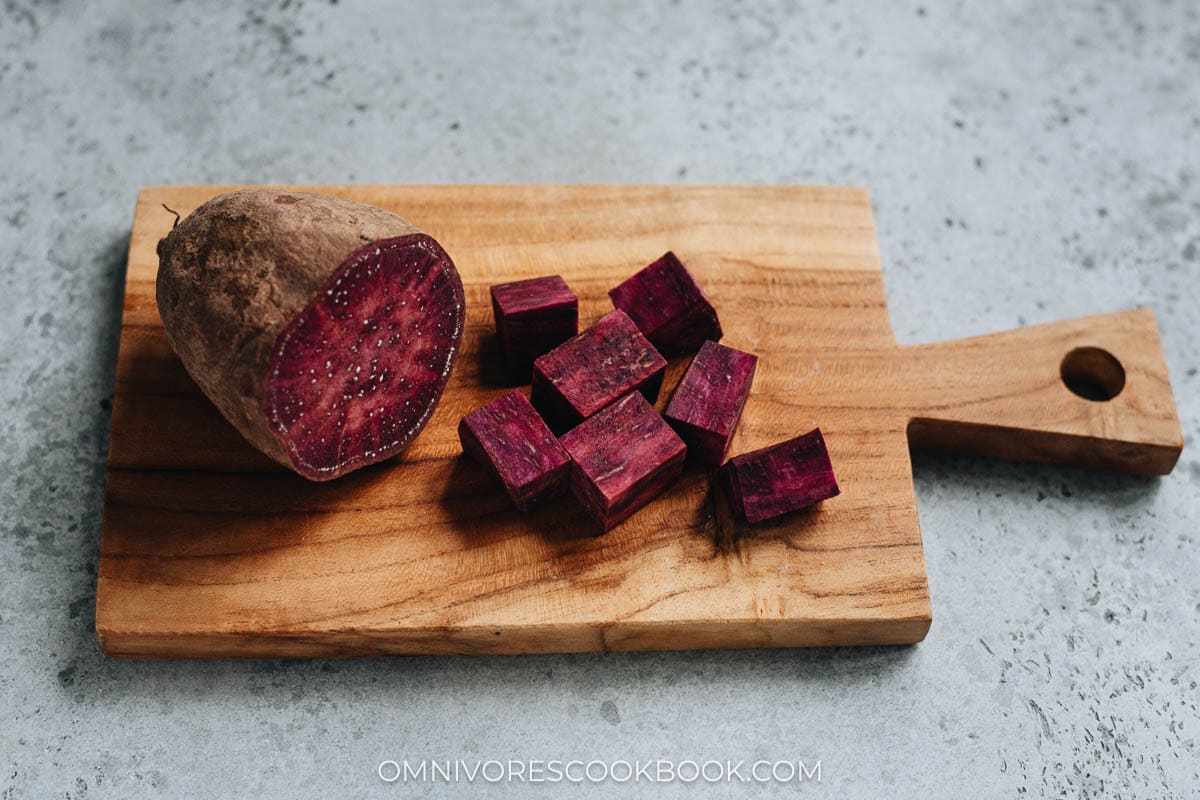
Purple sweet potato
I used purple sweet potato in this recipe to add a purple color to the taro filling. I also really like the taste of it.
If you do not have purple sweet potato, it is possible to use ube extract or purple food coloring to add the color.
If you only use taro root, with no deep purple ingredient, your bread filling will turn out with a very light purple color.
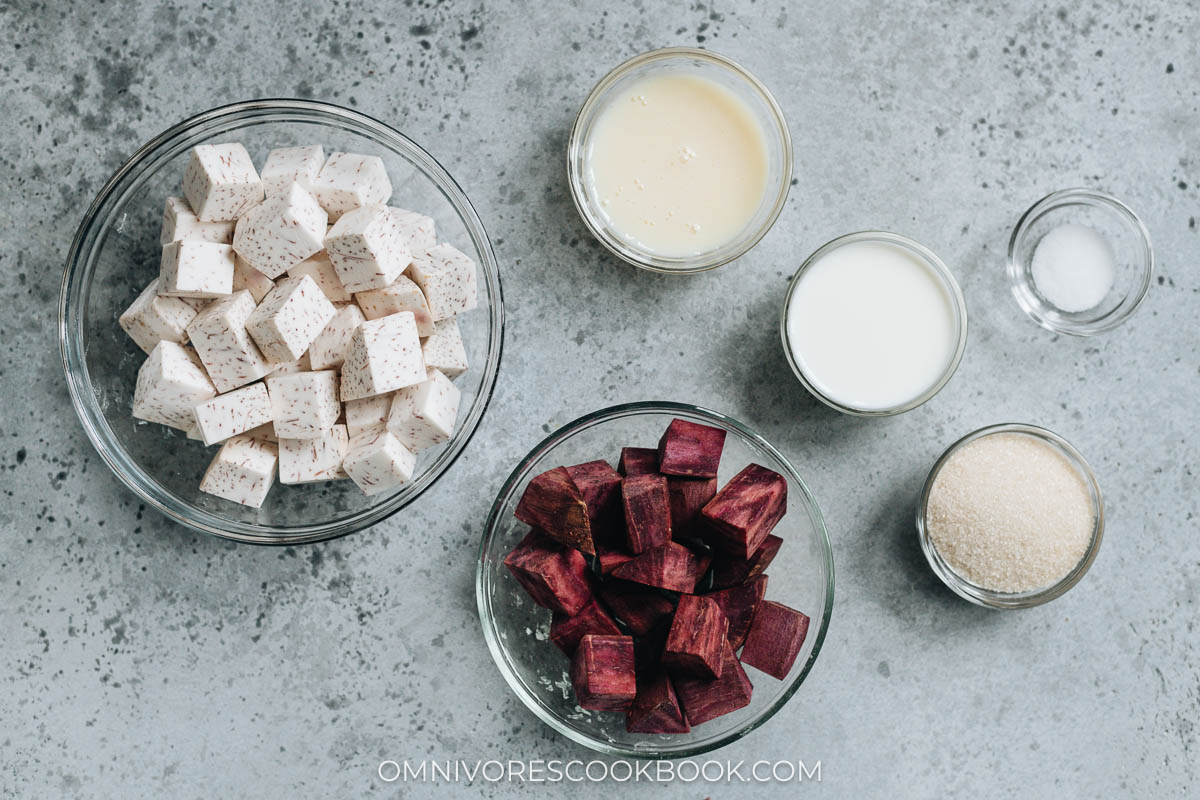
Ingredients for the milk bread
The milk bread base uses a few simple ingredients:
- Bread flour
- Whole milk
- Active dry yeast
- Sugar
- Salt
- Condensed milk
- Butter
- Egg
Different from other milk bread recipes, you only need to mix all the ingredients and knead the dough in a mixer. The bread will turn out extra fluffy, tender and light.
Bread filling
The filling is made with:
- Taro
- Purple sweet potato
- Sugar
- Condensed milk
- Salt
- Milk
How to make taro bread
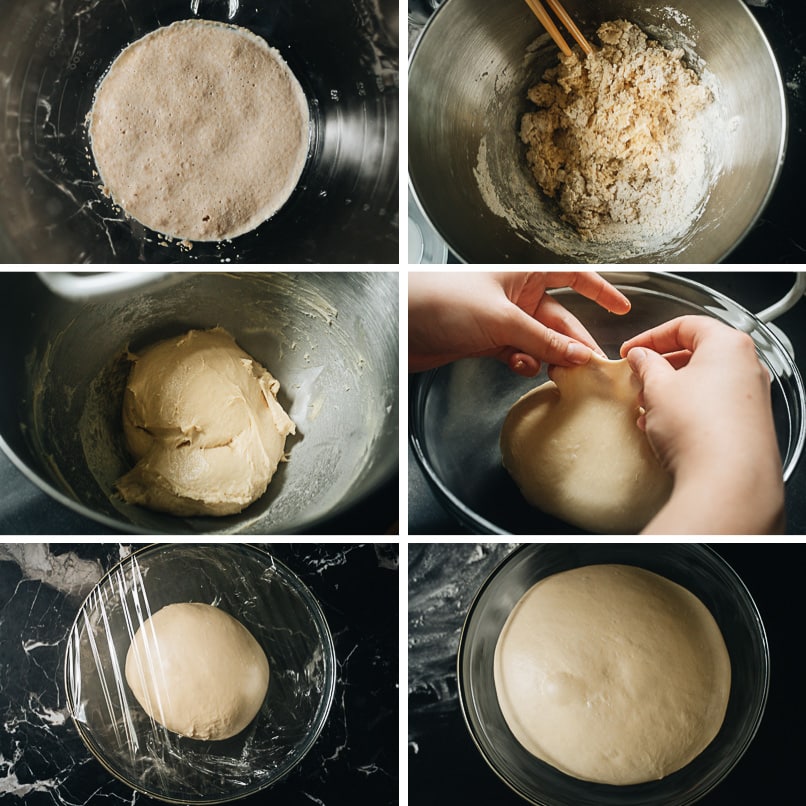
Prepare the milk bread dough
- Activate the yeast in warm milk
- Mix the bread dough ingredients in a mixing bowl until the dough comes together
- Knead in the mixer until springy
- Test the dough by stretching a small piece of dough. It should form a very thin and translucent sheet without breaking
- Rest the dough
- The dough is ready when the size has doubled
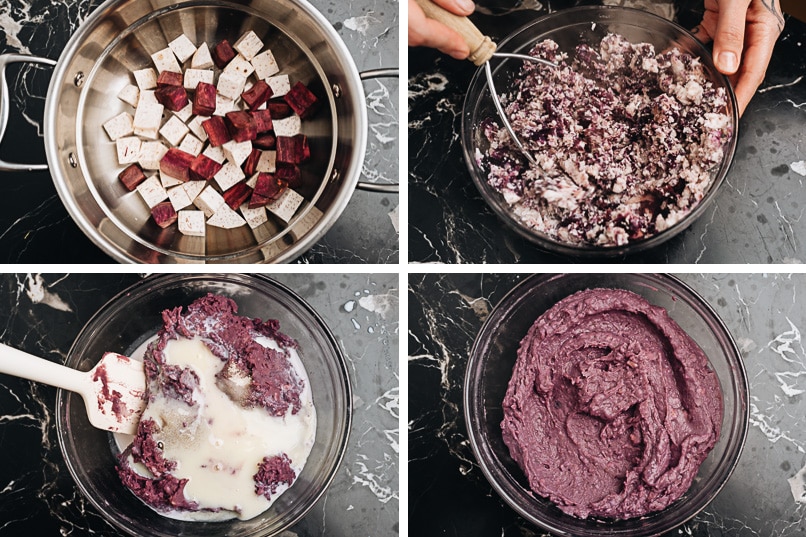
Prepare the taro filling
- Steam the taro and purple sweet potato until fork tender
- Mix together using a food processor or a masher
- Add the rest of the ingredients
- Mix again into a smooth paste
Assemble taro bread and cook
- Roll out the dough
- The width of the dough should be slightly longer than your loaf pan
- Spread out the taro filling
- Roll up the dough into a long log
- Shape the dough lightly so it will just fit into the loaf pan
- Transfer the dough into the loaf pan and let it rest
- Once the dough has risen, brush it with egg wash
- Bake until the inside reaches 180°F (82°C)
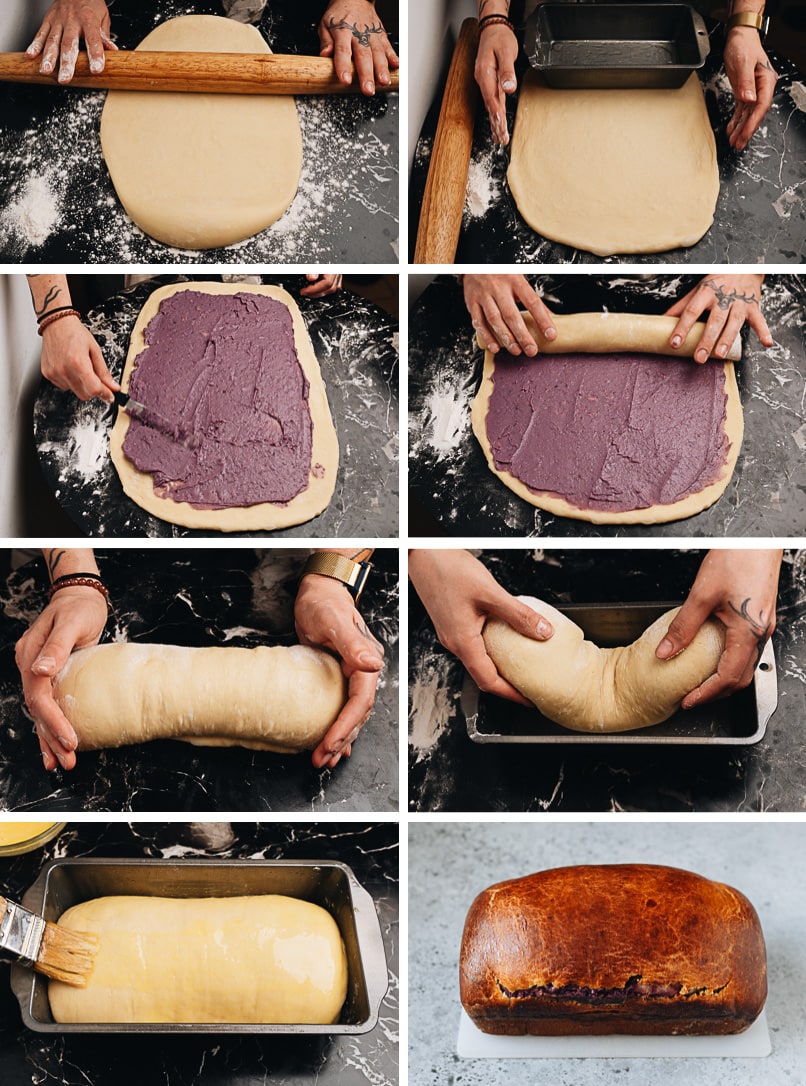
It does take some time and effort to make taro bread. But the dough is quite easy to work with, and the process is rather straightforward.
Not to mention, the result is super rewarding! The bread is so pretty and has a great taste. I enjoy serving it for a nice Sunday brunch or using it as an edible gift. It is also perfect for occasions such as Mother’s Day.
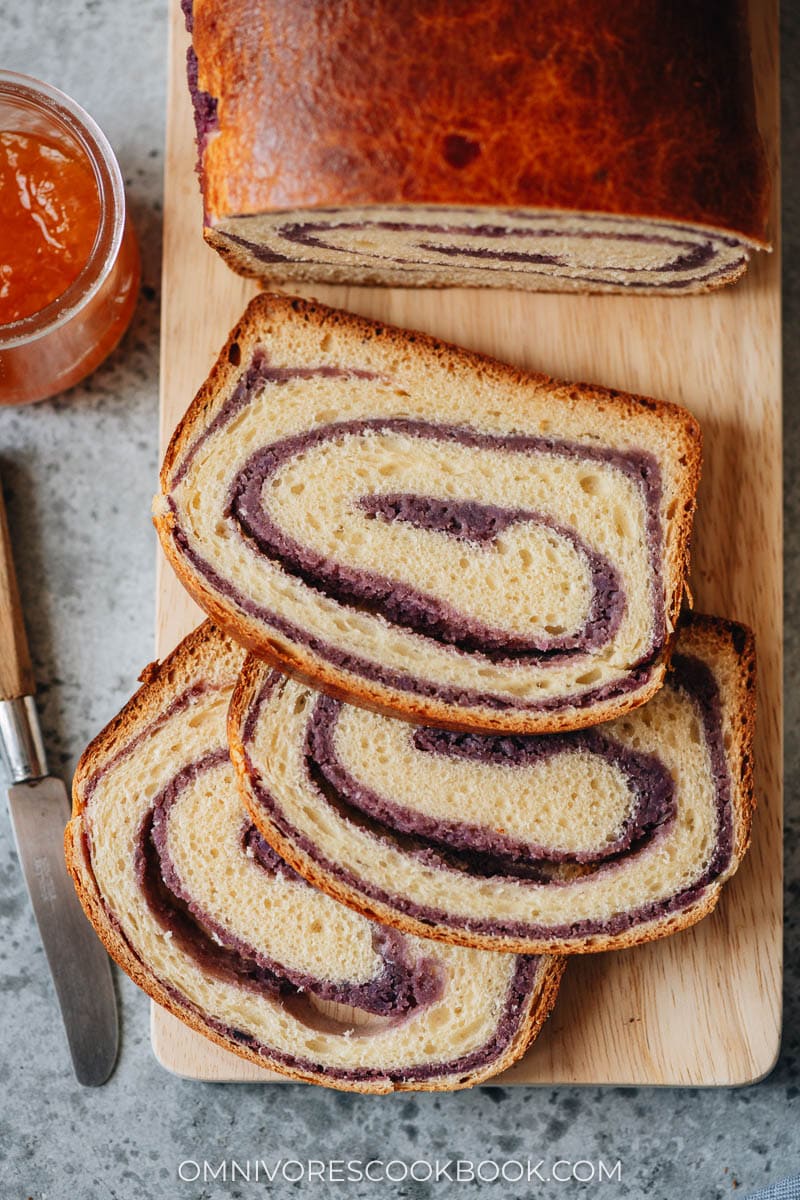
How to serve taro bread
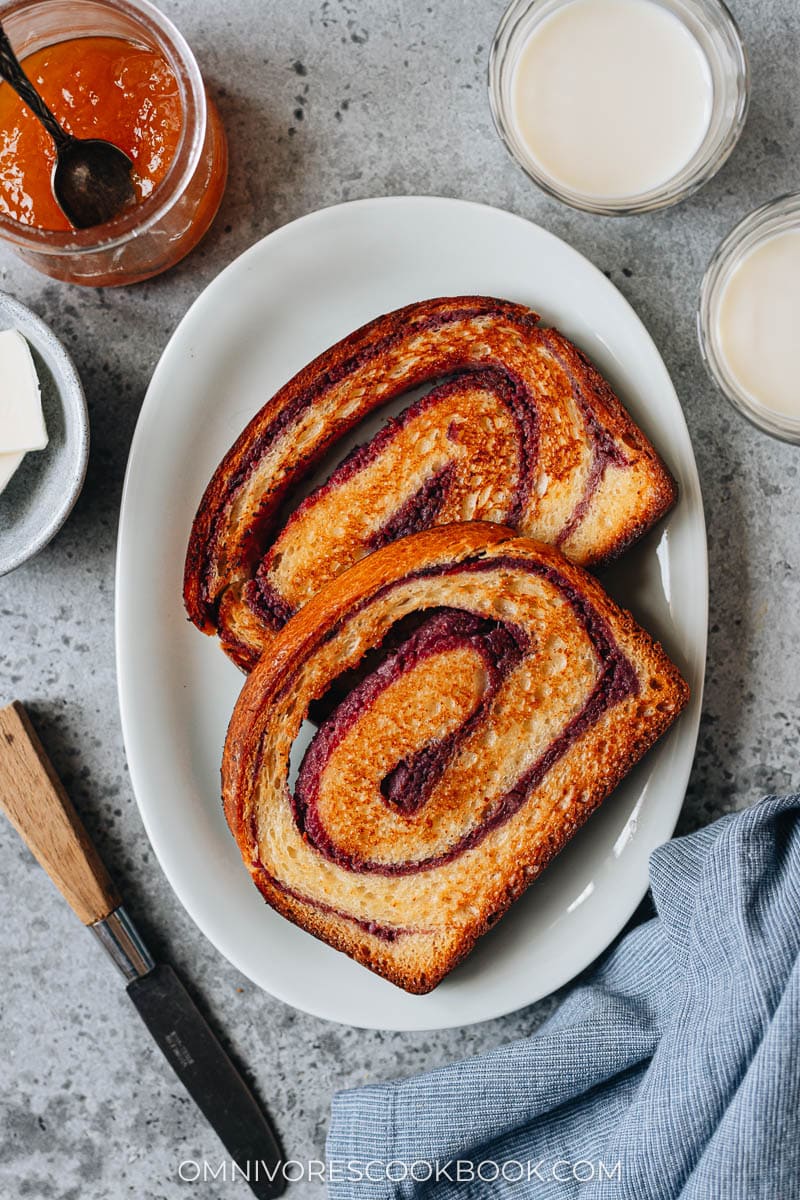
When it’s freshly made, taro bread is great, simply enjoyed on its own. Once refrigerated or frozen, I prefer to toast it before serving.
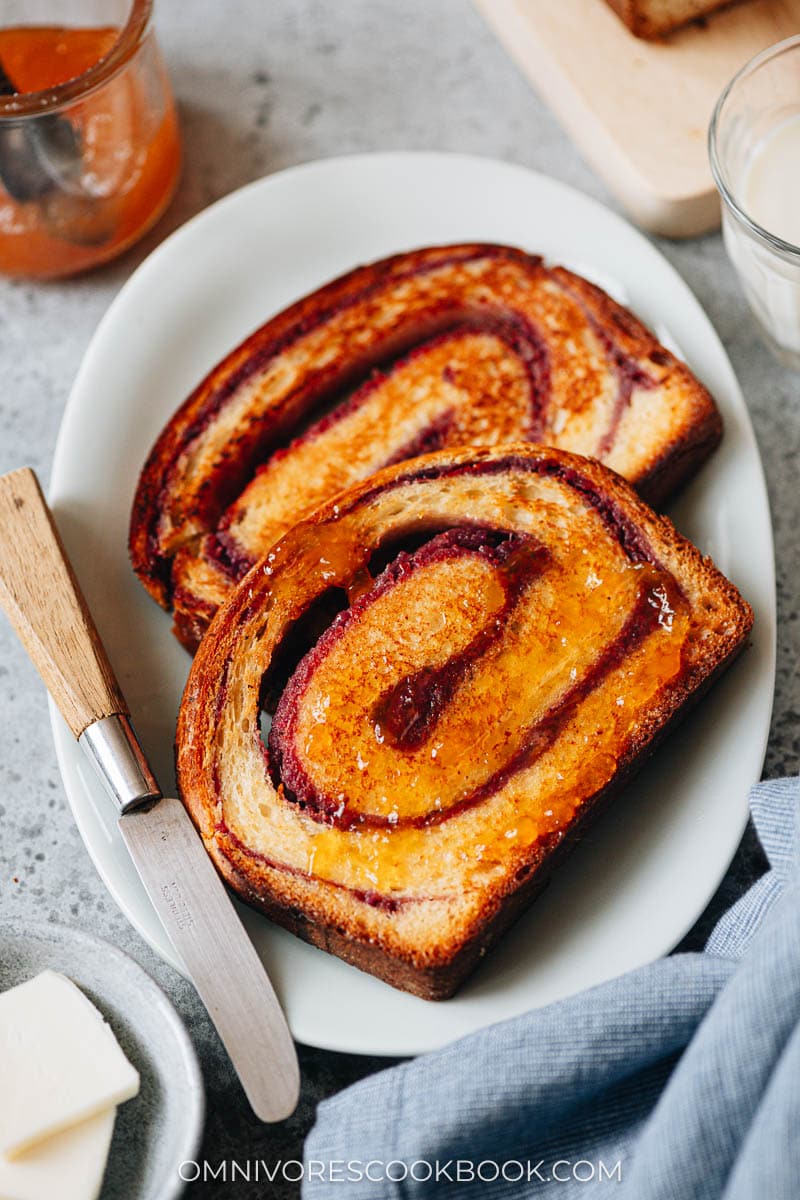
It is also delightful served with butter and jam, peanut butter, or made into an extra fancy French toast.
Other delicious Asian bakery recipes
Taro Bread
This taro bread has a light and fluffy milk bread base swirled with a lightly sweetened taro filling. Change up your regular loaf with this beautiful taro bread for a nice weekend breakfast, or make it as a special edible gift. {Vegetarian}
Servings: 1 loaf (20 slices)
Ingredients
Bread
- 300 g (2 1/2 cups) bread flour
- 140 ml (1/2 cup) whole milk and extra for brushing onto the bread
- 7 g (1 packet / 1 teaspoon) active dry yeast
- 30 g (2 1/2 tablespoons) sugar
- 5 g (1 teaspoon) salt
- 125 g (1/3 cup + 1 tablespoon) condensed milk
- 4 tablespoons butter melted
- 1 large egg
Filling
- 300 g taro
- 150 g purple sweet potato
- 50 g (1/4 cup) sugar
- 85 g (1/4 cup) sweetened condensed milk
- 1/2 tsp salt
- 70 g (1/4 cup) milk
Egg wash
- 1 large egg
- 1 tablespoon whole milk
Instructions
Prepare the bread dough – 1st rise
-
Add the milk into a small bowl and warm to approximately 100-110°F (38°C), about 30 seconds in the microwave. The milk should be warm, just a bit above body temperature. Add a pinch of sugar and the active dry yeast, stir a few times. Let sit for 5 minutes so the yeast will activate.
-
While the yeast activates, add the rest of the ingredients into your mixer bowl.
-
Once the yeast is activated, you should see bubbles on the surface of the mixture. Pour it into the mixer bowl. Mix with a spatula until the dough just comes together. Cover with plastic wrap and let rest for 20 minutes.
-
Install the dough hook on your mixer (I used a KitchenAid). Start at low speed, then gradually increase to setting 8 out of 10. Knead for 10 to 12 minutes, until the dough is very smooth. Stop the mixer in the middle and scrape the dough from the sides of the bowl. Test the dough by pulling a piece of it using both of your hands. It should stretch into a very thin and translucent sheet. The dough should be wet and a bit sticky.
-
Grease a big bowl with a thin layer of oil. Place the dough into the bowl. Cover with plastic wrap. Let rise until the dough doubles in size, about 1 hour.
Prepare the taro filling
-
Peel the taro and sweet potato, then cut them into 1” (2.5 cm) cubes. Prepare a steamer by boiling 2” water. Place the taro and sweet potato onto a steaming rack and steam until fork-tender, 10 to 15 minutes.
-
Transfer the steamed taro and sweet potato into a food processor if using one, and pulse until smooth. If not using a food processor, add them to a large bowl and mash with a fork until broken down.
-
Add the remaining filling ingredients. Blend in the food processor until smooth. Or if by hand, mix with a fork, mashing any remaining lumps until mostly smooth. Set aside to cool before adding it to the bread.
Assemble the bread and 2nd rise
-
Grease a 9” x 5” (23cm x 12.7cm) loaf pan with a thin layer of oil.
-
Punch the air out of the dough. Gently round out the dough using both of your hands without kneading. Transfer it onto a lightly floured working surface.
-
Roll the dough into a rectangle about the width of your loaf pan until it’s about 1/2” (1.3 cm) thick, with the short end facing you.
-
Start by adding about a half of the taro filling onto the dough, and add more if needed. Spread the taro filling using an offset spatula into a thick layer, covering the dough almost all the way to edges, leaving a 1/2” (1.3cm) border on the edge. You will probably end up using 2/3 to 3/4 of the filling, with some left over. (*Footnote 1)
-
Start rolling up the dough from the short end that is closest to you, into a tight log. Pinch both ends lightly to seal in the filling. Gently push both ends of the dough with your hands to adjust the size of the loaf, so it will fit evenly in the loaf pan. Transfer the rolled log into the lightly greased loaf pan, seam side down.
-
Cover loosely with plastic wrap, and let proof in a warm place until puffy and reaching the top of the pan, 40 minutes to an hour.
Bake the bread
-
Mix the egg wash ingredients together in a small bowl. Preheat the oven to 325° F (163° C).
-
Once the loaf is fully proofed, gently brush the egg wash onto the top.
-
Bake at 325°F (163°C) for about 40 to 45 mins, or until the thermometer reads 180°F (82°C) when inserted into the thickest part.
-
Let the bread rest in the pan for 5 minutes, then transfer it onto a cooling rack. Let cool completely before slicing.
Store & serve
-
Once the bread has cooled completely, you can store it in an airtight container on your kitchen counter for up to 2 days or in the fridge for 4 to 5 days. For longer storage, place the bread in a ziplock bag, squeeze out as much air as possible, and store it in the freezer for up to a month. If you have stored the bread in the fridge or freezer, it’s best to toast the bread before serving.
-
Serve the sliced bread by itself or with butter and jam, or make it into French toast. Enjoy!
Nutrition
Serving: 1serving, Calories: 151kcal, Carbohydrates: 25.1g, Protein: 3.5g, Fat: 4.2g, Saturated Fat: 2.4g, Cholesterol: 29mg, Sodium: 105mg, Potassium: 189mg, Fiber: 1.2g, Sugar: 10.5g, Calcium: 56mg, Iron: 1mg

