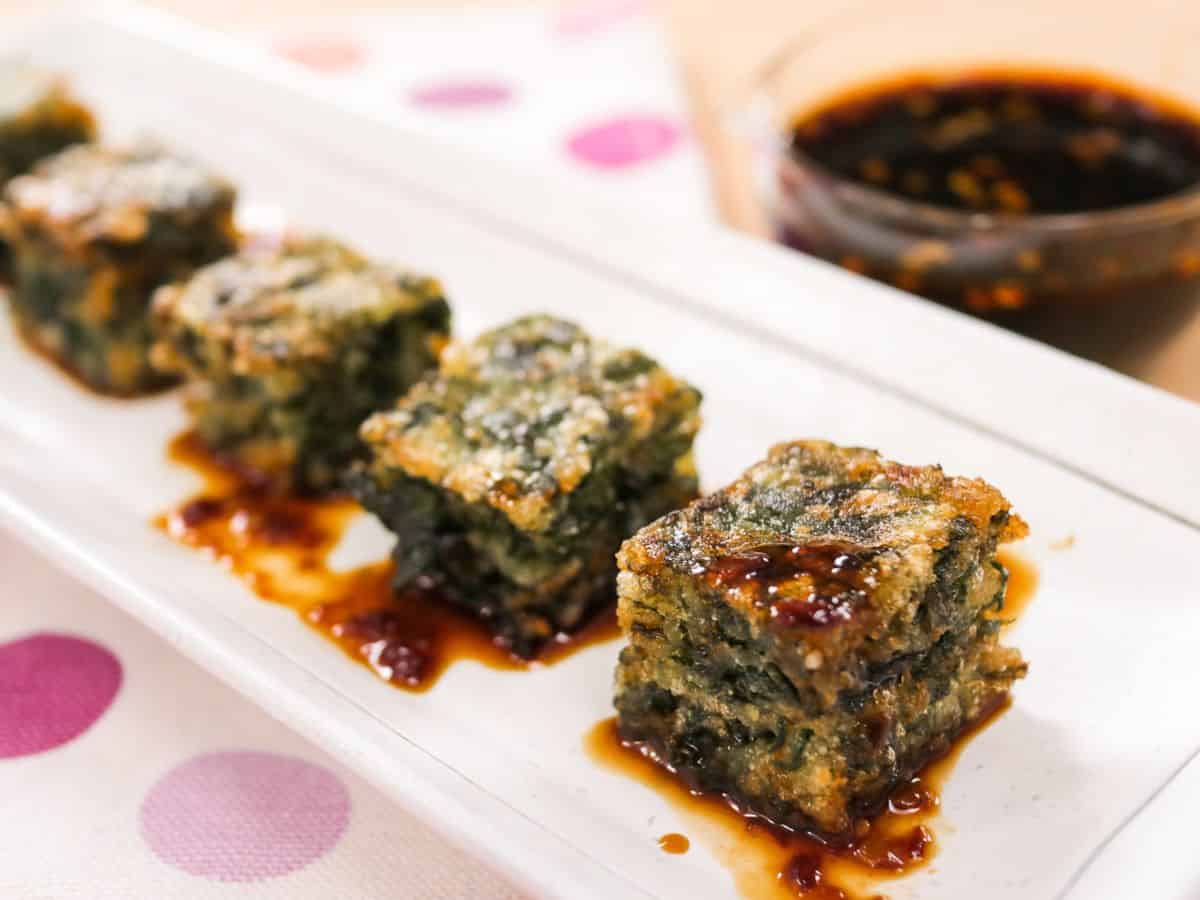
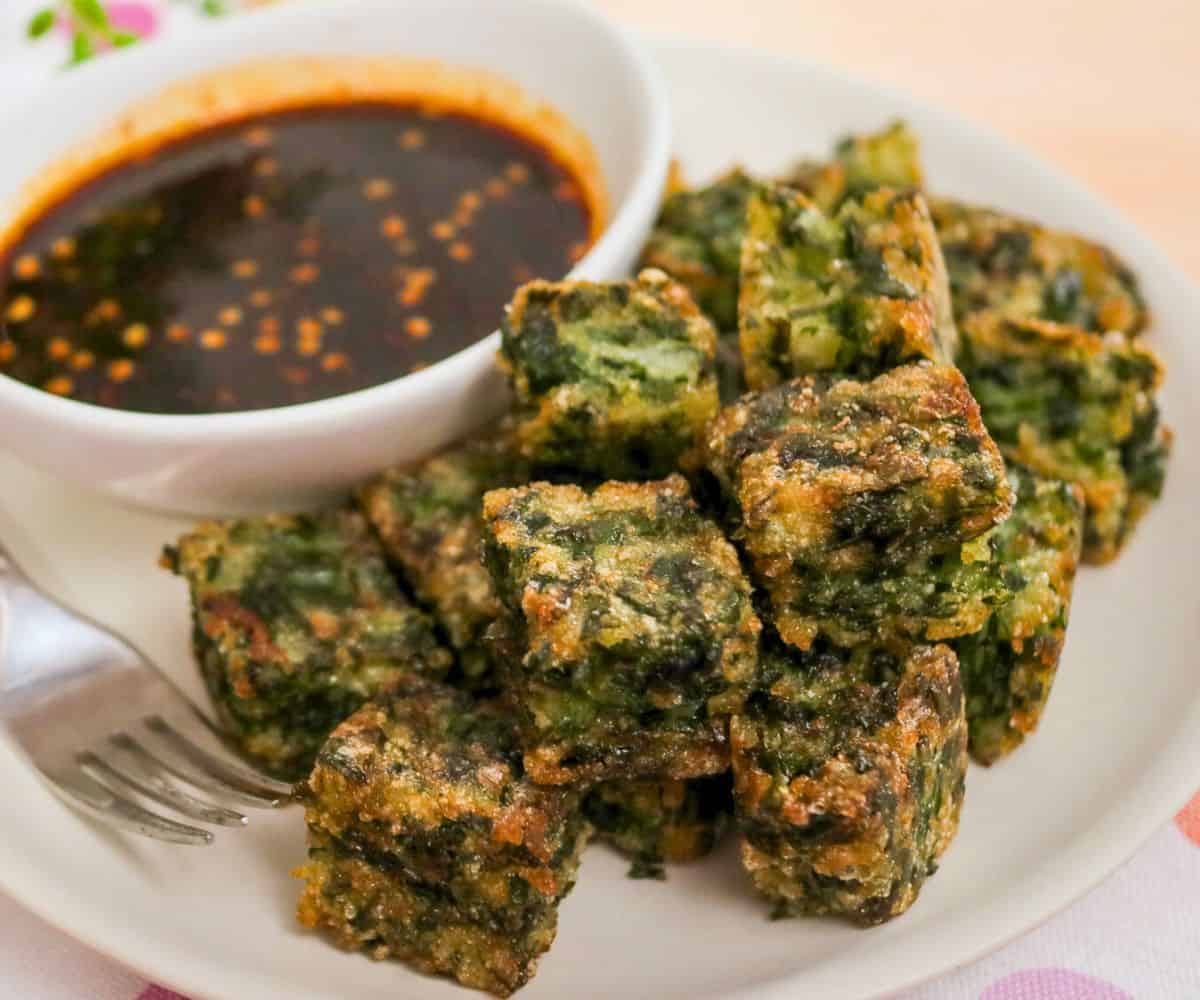
Don’t let the amount of vegetables in this popular street food throw you off. I didn’t love vegetables as a kid and I would devour these every time. Garlic chives become so tender they almost melt in your mouth, and with the soft & chewy dough that is crispy on the outside…and the sweet & sour dipping sauce…oh man…these are a MUST try.

What is Kanom Gui Chai?
There are two types of kanom guichai ขนมกุ๊ยช่าย in Thailand. The classic version is the stuffed version, which is much harder because you have to make a dough and wrap the garlic chives inside. These are the ones I grew up eating, but after watching my grandmothers (both of them!) painstakingly make the dough (which is not easy) and wrap each dumpling (even more not-easy)…I had zero desire to go through the same ordeal, lol.

Then there are these fried ones, which I only discovered later in life and fell in love with them immediately. They are a thousand times easier, but deliver the same flavours that I love in the classic ones. Instead of stuffing, the chives are mixed right into the batter, so no fiddly wrapping required! And IMO they’re just as delicious if not more because they are crispy! Oh yeah, and it happens to be gluten-free and vegan and all that good stuff 🙂
Still have some leftover garlic chives from this recipe? Then it’s time to make an authentic pad thai, or my best pork dumplings (gyoza)!
Watch The Full Video Tutorial!
All my recipes come with step-by-step video tutorials with extra tips not mentioned in the blog post, so make sure you watch the video below to ensure success – and if you enjoy the show, please consider subscribing to my YouTube channel. Thank you!
Ingredients and Notes
Here are all the ingredients and important notes about them. Amounts and full instructions are in the recipe card below!
Dumplings
- Garlic chives, also known as Chinese chives or nira (in Japanese), are available at most Asian grocery stores. Some garlic chives can harbour a lot of dirt at the bottom of the plant where the leaves are joined, so you need to cut off about 1.5 inch off the bottom and then shake them in a bowl of cold water to remove the dirt before using. IMPORTANT: After washing dry off the chives as best you can! If there is a lot of water left in the chives it will make the dough too soft. I shake off the water as much as possible, then lay them on a tea towel, cover them with another, and roll them gently between the two towels.
- Sugar
- I am willow
- Salt
- Baking soda (optional). Baking soda is added to maintain a more vibrant green colour.
- Neutral oil
- Garlicfinely grated or minced, or you can substitute with garlic powder. If you have some garlic oil handy you can use garlic oil instead of the neutral oil and omit the garlic altogether.
- White pepper
- Rice flour. If you’re buying rice flour from Thailand, be sure to get the one in the red bag which is regular rice flour. DO NOT GET glutinous rice flour in the green bag.
- Tapioca starch. While rice flour provide tenderness, tapioca starch will add a bit of bounce and chew.
- Water
Dipping sauce
- Sugar
- Water
- White vinegar, or rice vinegar
- Sweet soy sauceI use ABC soy sauce or Thai Healthy Boy Brand sweet soy sauce. You can also substitute dark brown sugar.
- I am willow
- Sambal oelek or minced Thai chilies. Can be omitted if you want to make this not spicy
How to Make Crispy Garlic Chives Dumplings
Here’s a bird’s eye view of the process. If this is your first time I recommend watching the video tutorial, especially so you can see the texture of the dough. Full instructions are in the recipe card below!


- Place the chives in a mixing bowl, and add salt, sugar, soy sauce, baking soda, oil, white pepper and garlic, and mix until combined. Let sit for at least 20 minutes until the chives are wilted.
- Meanwhile, make the dipping sauce by combining all ingredients and stirring until sugar is dissolved. This sauce will keep in the fridge for weeks!
- Make the batter: Combine water, rice flour and tapioca starch in a pot and stir until there are no more lumps. Turn the heat on LOW and stir the mixture constantly with a spatula.
- As the flour starts to cook and congeal into lumps, pull the pot off heat occasionally to smush any flour lumps against the sides to break them up. Continue stirring CONSTANTLY just until the mixture is thick enough that the chives can be evenly suspended in the batter (it can be thinner than in the pic). Remove from heat and continue stirring to break up any lumps of flour to make sure the consistency of the batter is even throughout.


- Off heat, add the garlic chives into the batter until well combined.
- Grease a 7-inch round cake pan with oil (or use any heatproof container). Line the bottom of the pan with parchment paper. Pour the batter into the pan and smooth off the top.
- Preheat a steamer with boiling water. If you’re not using a bamboo steamer lid, wrap a towel around the lid of the steamer to prevent water from dripping onto the surface of the dumplings. Alternatively cover the dumplings with foil. Steam the dumplings for 15 – 20 minutes if using a 7-inch round pan, but this can be longer if you’re using a smaller container (and therefore the batter is thicker). If you have an instant-read thermometer, the internal temperature of the middle should reach 190°F.
- Let the dumpling cool completely then you can keep them in the fridge for up to a week until ready to eat.


- When ready to eat, use an oiled knife to cut the dumplings into bite-sized cubes. If there is a lot of dough sticking to the blade between cuts, wipe it off and re-oil the blade.
- To fry: In a non-stick pan, add just enough oil so it comes up just below half the height of the dumplings. Heat until hot and fry them until well browned and crispy, making sure to not let them touch while in the pan or they will stick together.
- Flip and fry them on the other side until well browned.
- Drain excess oil on a paper towel-lined plate and serve while they’re hot and crispy with the dipping sauce!
Advance Prep Tips
These are the perfect make-ahead appetizers. You can steam the batter and keep it in the fridge. When ready to eat, cut and fry them up (or you can cut them in advance so all you need to do is fry!). The dipping sauce will also last you a long time in the fridge as well.
Can these be made in the air fryer?
The raw batter has to be steamed in a steamer, but you might wonder if the frying part can be done in an air fryer. I have tried this, and while it “works” it’s really not as good because the dumplings came out not nearly as well browned and quite a bit drier.
But were they “fine”? They were fine. And if you’re really not in the mood to pan-fry things and are willing to compromise on deliciousness, then here’s what you do:
- Toss the cut dumplings in a generous amount of oil.
- Place them in an air fryer basket without letting them touch, then air fry at 400°F (200°F) for 4-5 minutes or until well heated through and slightly browned on the exterior. Don’t try to cook them longer to get them more browned because they will dry out too much.
Recipe Card


Crispy Garlic Chive Dumplings (Guichai Tod)
Prep Time:
15 mins
Cook Time:
45 mins
Total Time:
1 hour
Yield:
Serves 4-5
Description
A popular Thai street food, these garlic chive dumplings are chewy in the middle and crispy on the outside, and the chives just melt in your mouth. Easy to make, and can be done ahead of time as well!
Instructions
- Cut about 1.5 inch off the bottom of garlic chives and discard. Some garlic chives can harbour a lot of dirt at the bottom between the leaves, if this is the case, shake them in a bowl of cold water to remove the dirt before using.
- After washing dry off the chives as best you can! If there is a lot of water left in the chives it will make the dough mushy. I shake off the water as much as possible, (use a salad spinner if you have it), then lay them on a tea towel, cover them with another, and roll them gently between the two towels.
- After washing and drying the chives (see important note) cut the chives into small pieces, a little shy of 1 cm, and place in a mixing bowl. Add salt, sugar, soy sauce, baking soda, white pepper, oil and garlic and mix until combined. Let sit for at least 20 minutes or until the chives look wilted, and liquid has been drawn out of them.
- Meanwhile, make the dipping sauce by combining vinegar, water and sugar and stir until the sugar is dissolved. Add all remaining ingredients are stir to combine. This sauce will keep in the fridge for weeks!
- Make the batter: Combine water, rice flour and tapioca starch in a pot and stir until there are no more lumps. Turn the heat on LOW and stir the mixture constantly with a spatula. As the flour starts to cook and congeal into lumps, pull the pot off heat occasionally to smush any flour lumps against the sides to break them up. Continue stirring CONSTANTLY just until the mixture is thick enough that the chives can be evenly suspended in the batter (think Greek yogurt consistency), then remove from heat and continue stirring to break up any lumps of flour. Be careful not to cook the batter too much or you will have a hard time incorporating the chives into it.
- Off heat, stir the chives into the batter until well combined.
- Grease a 7-inch round cake pan with oil (or use any heat proof container of your choice, but smaller containers will increase cooking time). Line the bottom of the pan with parchment paper. Pour the batter into the pan and smooth off the top.
- Preheat a steamer with boiling water. If you’re not using a bamboo steamer lid, wrap a towel around the lid of the steamer to prevent water from dripping onto the surface of the dumplings. Alternatively you can cover the pan with foil. Steam the dumplings for 15-20 minutes over rapidly boiling water, or until fully cooked. Timing will change depending on the container you’re using and how thick the batter is. If you have a thermometer, the internal temp of the centre of the batter should reach a minimum of 190°F.
- Let the dumpling completely cool, or chill until ready to eat (it’ll be easier to cut when cold). You can keep it at this stage for up to 1 week. When ready to eat, run a knife along the sides and flip it out. Use a sharp knife, grease it with oil, and cut the dumplings into bite-sized pieces. If there is a lot of dough sticking to the blade between cuts, wipe it off and re-oil the blade.
- Fry the dumplings: In a non-stick pan, add just enough oil so it comes up just below half the height of the dumplings. Heat until hot and fry them on both sides until well browned and crispy, making sure to not let them touch while in the pan or they will stick together. Drain excess oil on a paper towel-lined plate.
- Serve while they’re hot and crispy with the dipping sauce!

