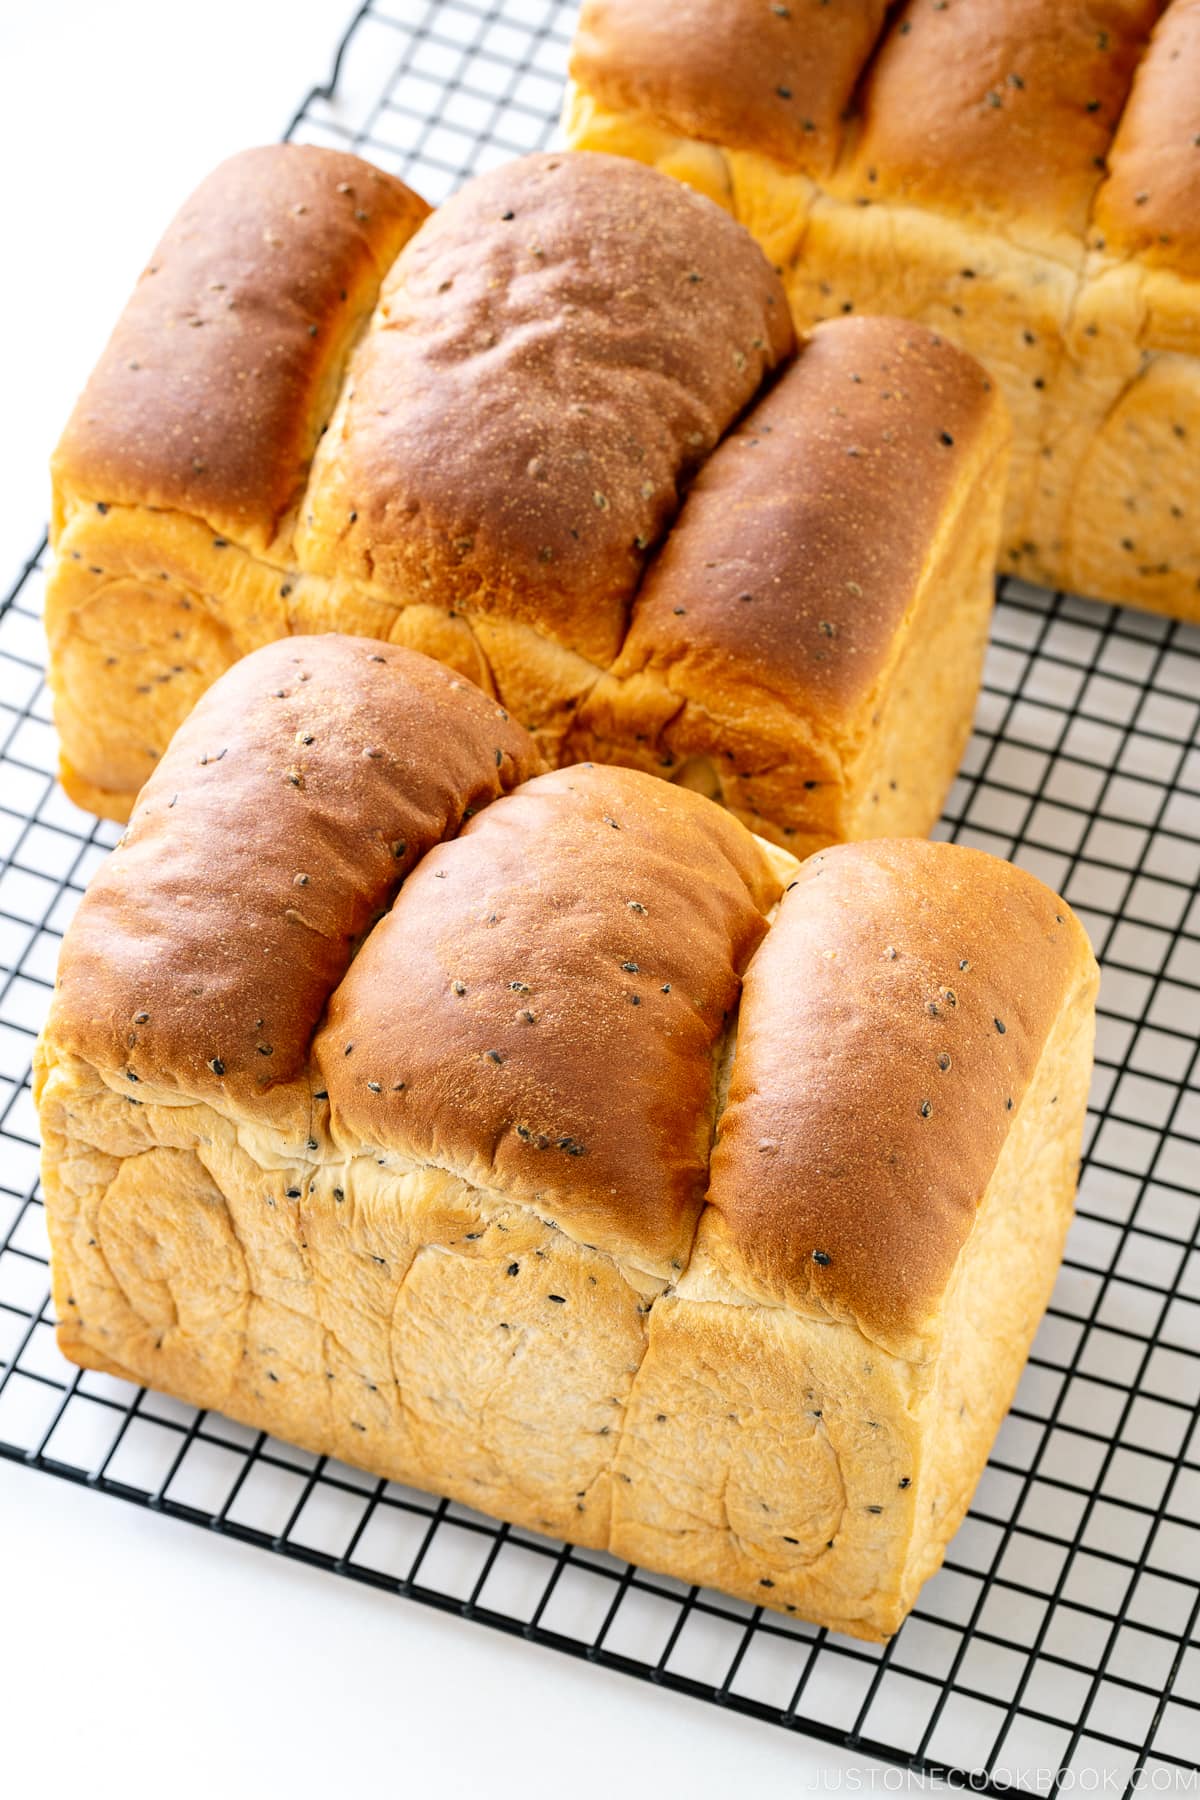
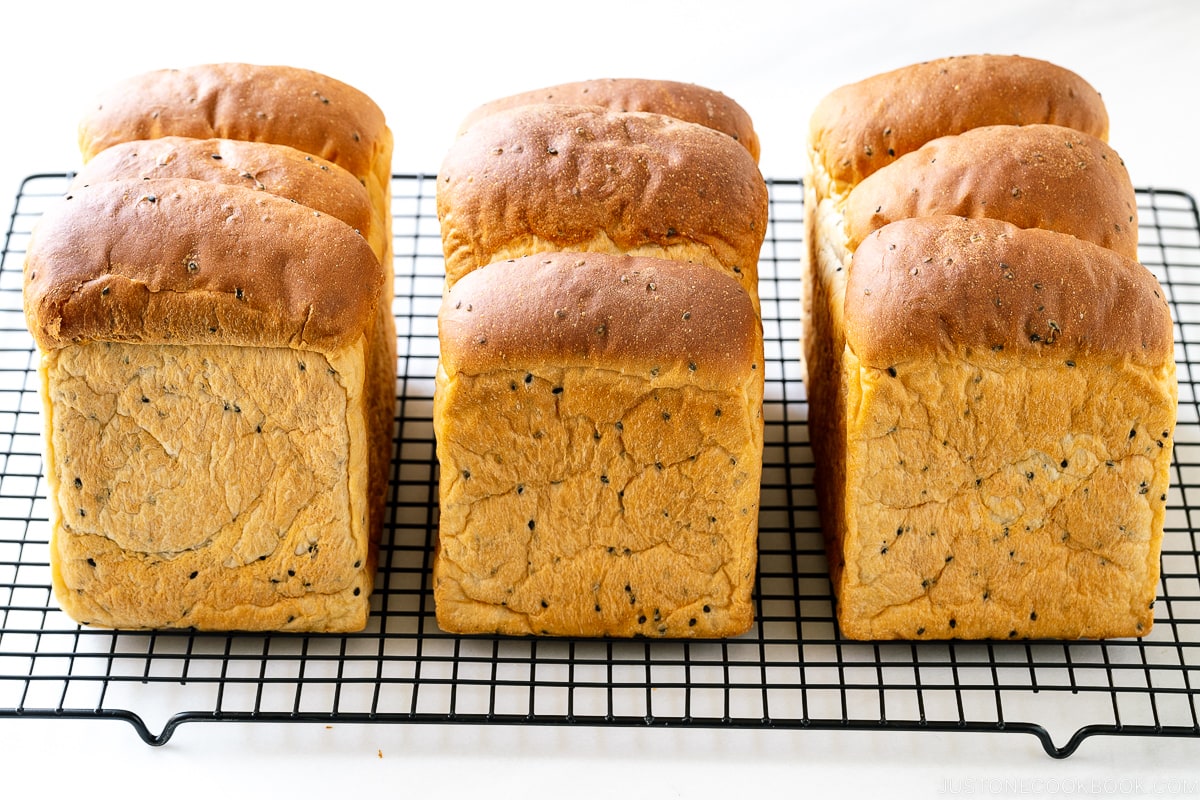
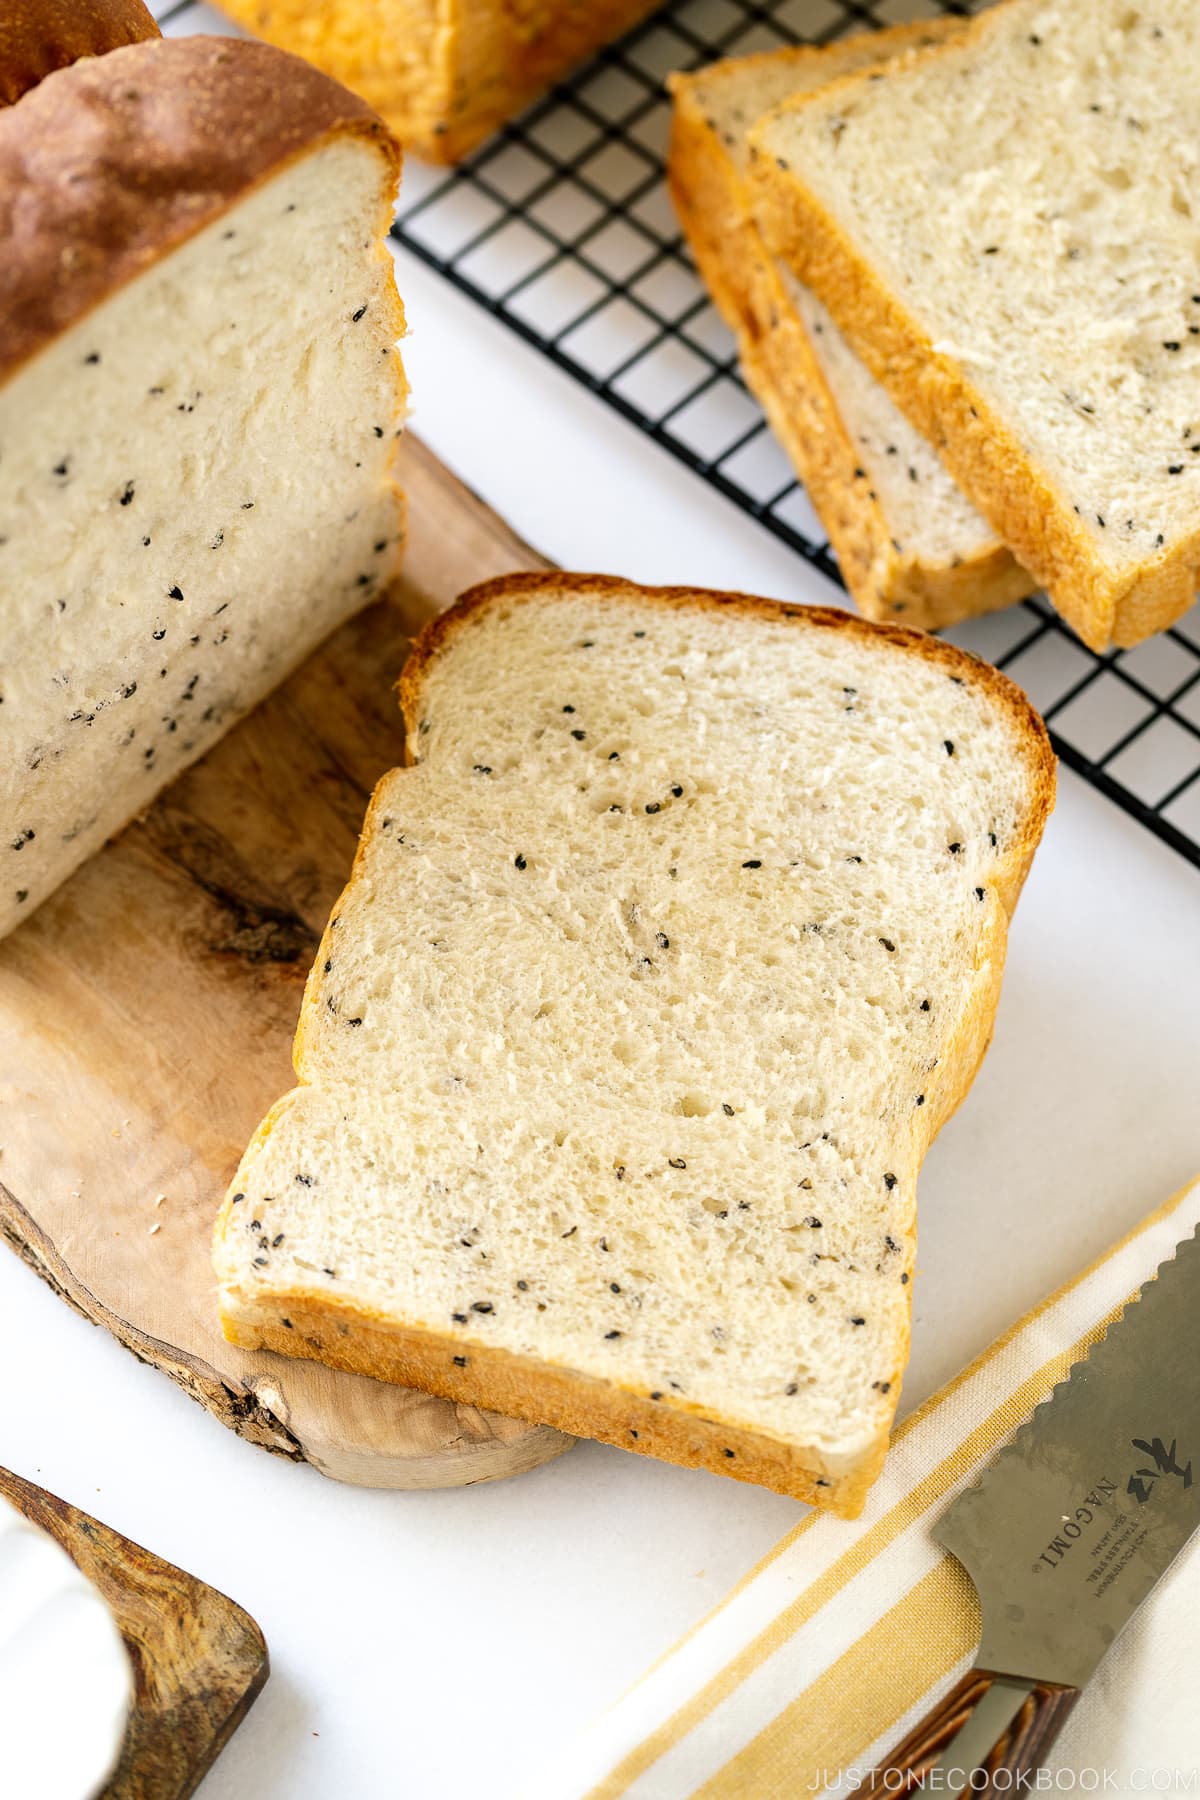
You’ll absolutely love this Black Sesame Milk Bread (Shokupan)! Nutty and earthy with a pleasant aroma, black sesame seeds complement the milky-sweet taste of Japanese milk bread. Enjoy this perfectly fluffy bread as breakfast toast, snack, and in sandwiches.
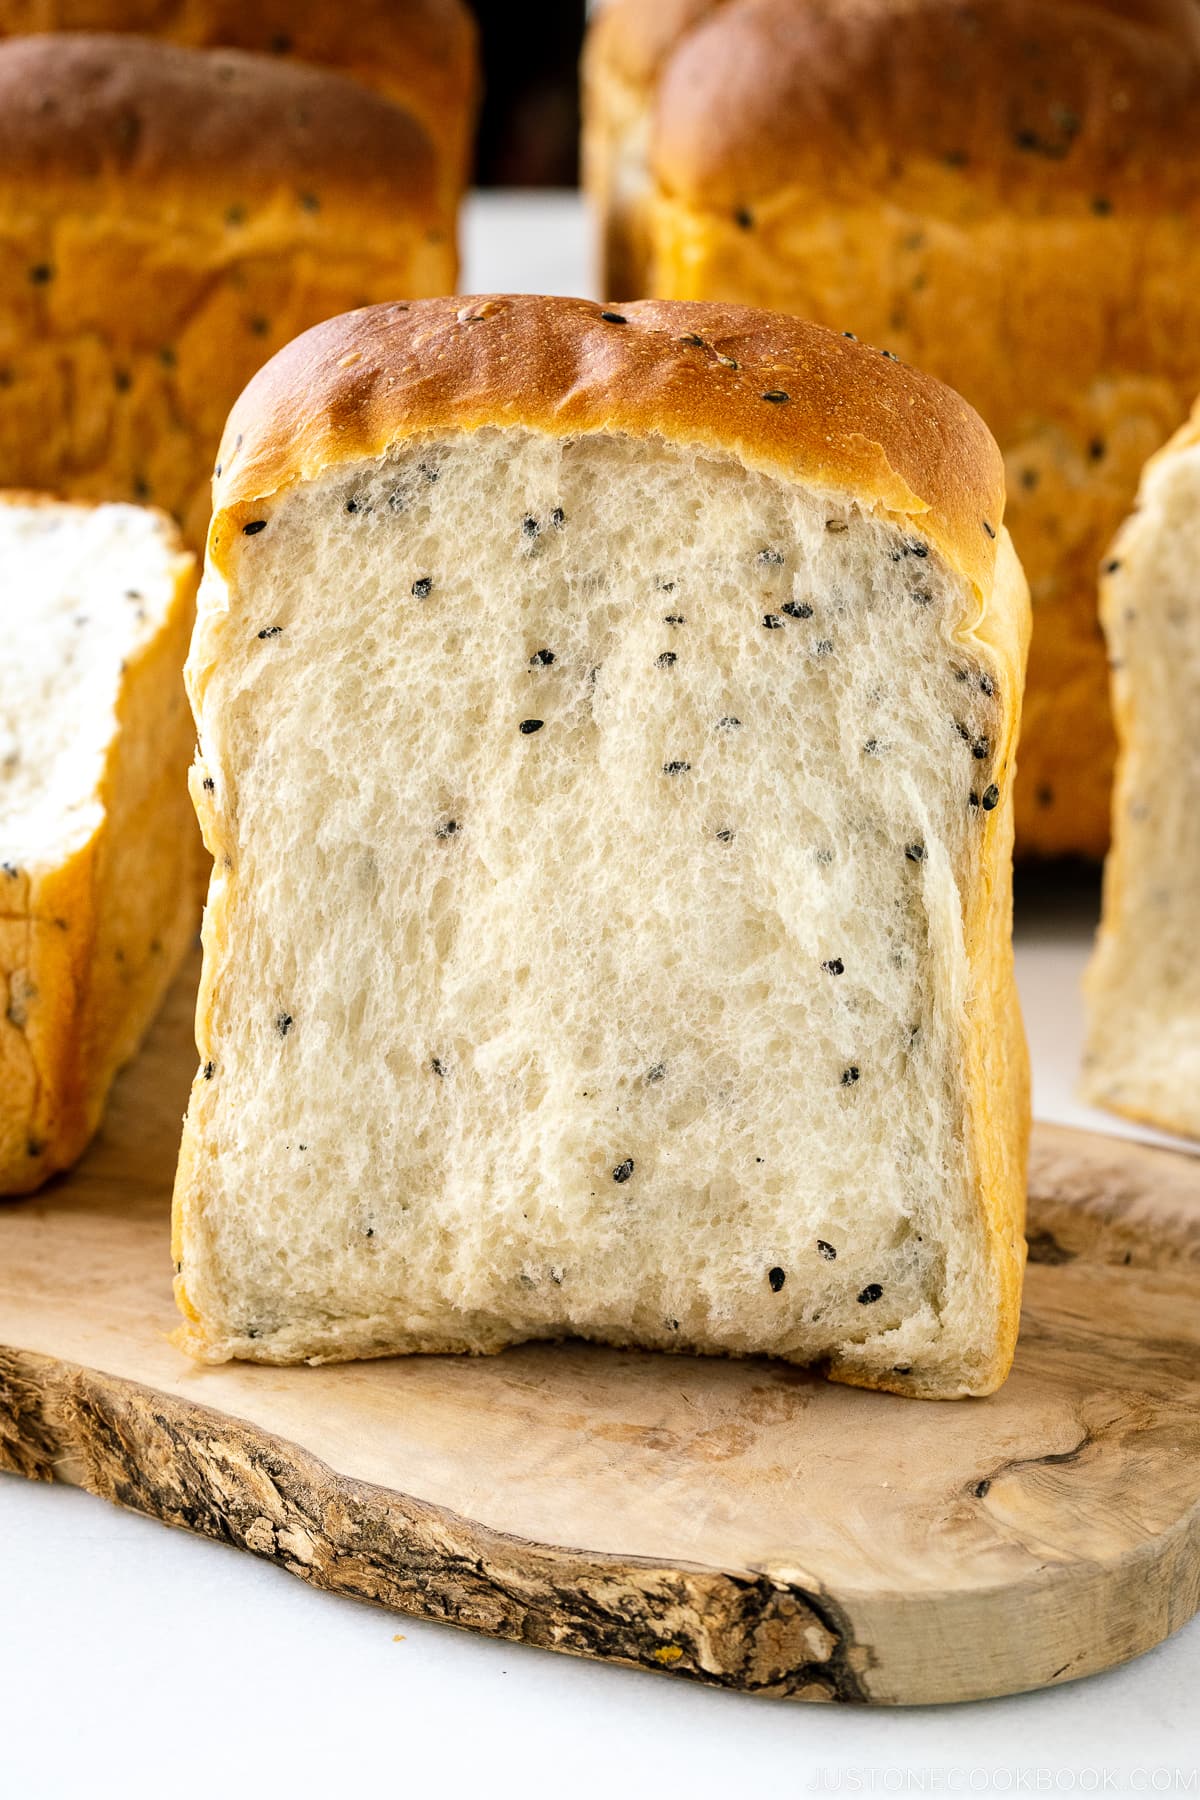
I’m back with a popular variation of Japanese Milk Bread (Shokupan) – Black Sesame Milk Bread (黒ごま食パン). The earthy black sesame seeds stud the loaf with a nutty crunch and impart an amazing aroma, which is especially delicious for savory Japanese sandwiches. But it’s so good that you might want to devour it the moment the loaf comes straight out of the oven!
What is Shokupan?
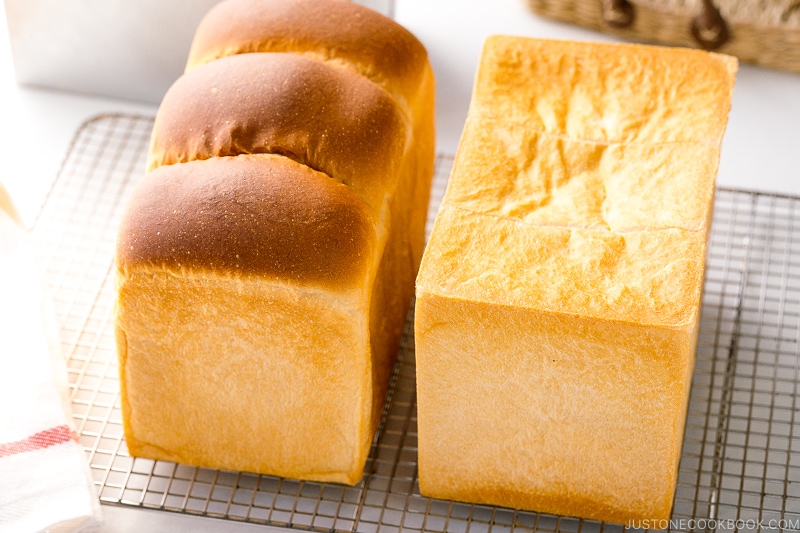
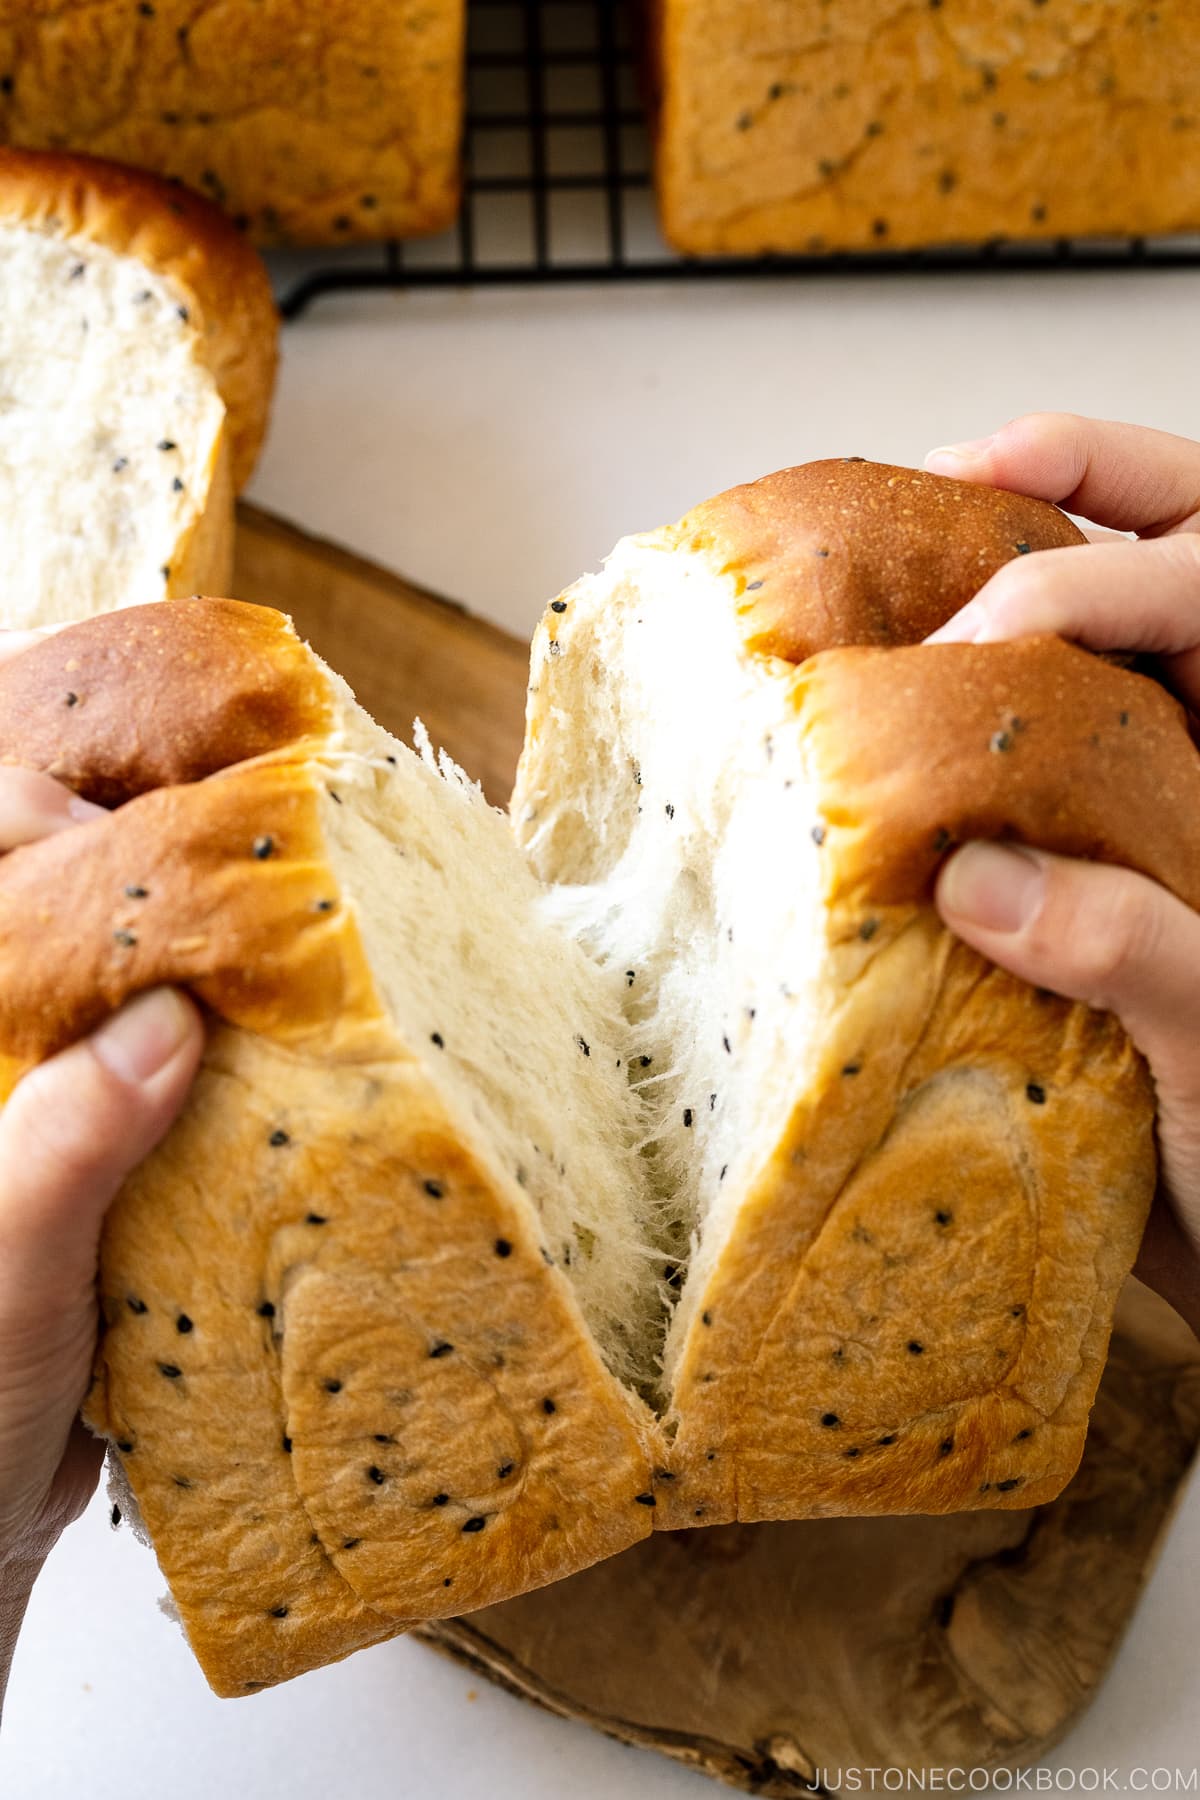
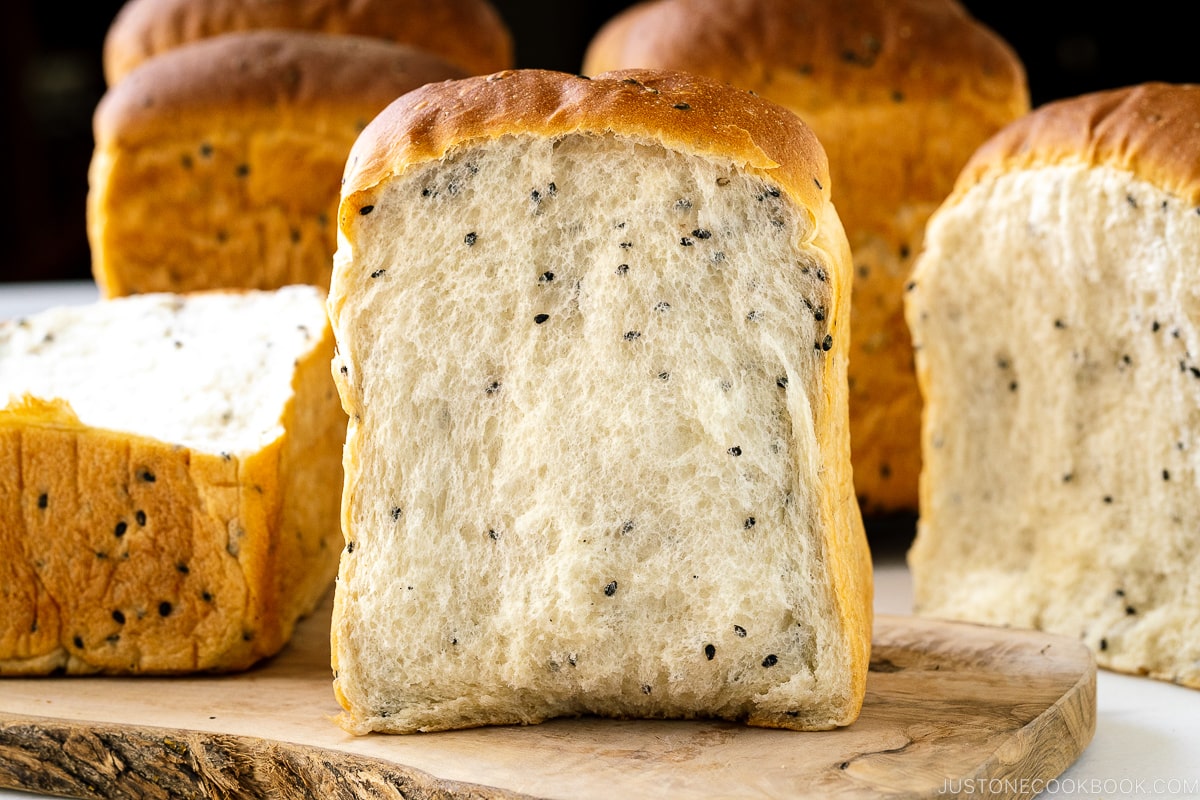
Shokupan (食パン), or Japanese milk bread, is the most common style of Pullman loaf bread enjoyed in Japan. It is known for its cloud-like fluffy texture, thin gold crusts, and the milky sweet taste that melts in your mouth.
Much like many iconic foods in Japan, shokupan can be both humble and elevated. You can find loaves of milk bread on the shelves of konbini (convenience stores) or at trendy cafes and bakeries that specialize in making shokupan in a variety of fun flavors. People would line up for hours just to get their freshest loaves.
Today, shokupan is popular all over the world and I’ve seen a strong passion and interest among many bread makers and home cooks alike in making their own Japanese milk bread at home. Unbelievably squishy, moist, and buttery with just the right amount of sweetness, it is really hard not to adore shokupan.
My Japanese Milk Bread Recipe
There are many different methods of making shokupan. While many recipes follow the yudane or tangzhong methods, I use a much easier and more straightforward technique. You’re guaranteed the best loaf of milk bread in a shorter time.
If you’re interested in the classic Japanese Milk Bread (Shokupan) recipe or want to learn more about this bread, please check this post.
Fun and Tasty Addition to Shokupan
I love the classic plain white shokupan, but I also enjoy a variety of fun flavors that can be added to the milk bread. Here are some popular ones you can make:
- Black sesame seeds – today’s recipe
- Dried fruits (raisins, cranberries, figs, etc) – rehydrate by pouring hot water and pat to dry
- Nuts (walnuts) – roast and let cool before adding
- Sweet potatoes and kabocha – cut into small cubes and reduce the liquid for the dough as vegetables contain moisture
- Cheese – cut into small cubes
- Chocolate chips
- Corn
As a rule of thumb, the ideal amount of nuts and dried fruits is 20 to 30% of the dough. Add them when you’ve passed the windowpane test.
Must-Haves
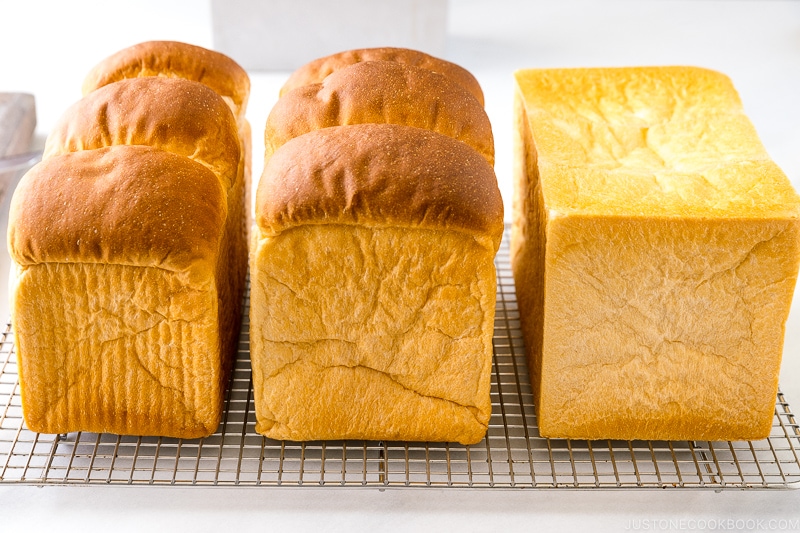
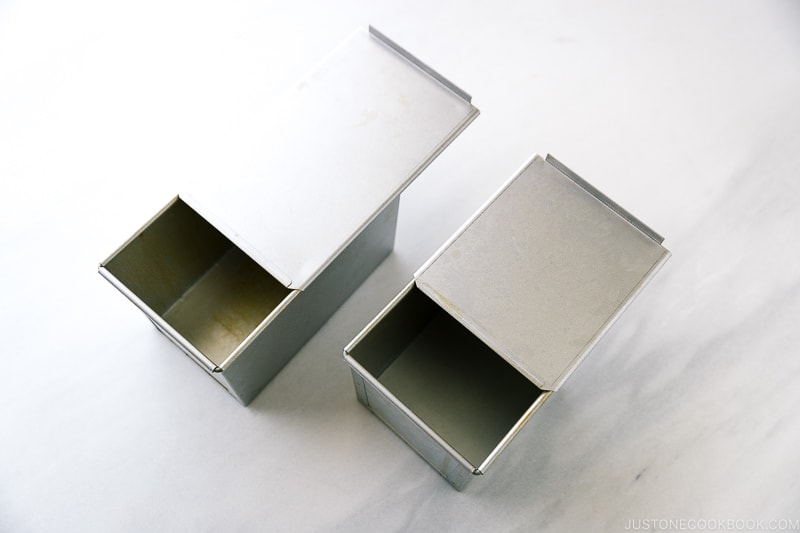
- A Pullman loaf pan—I use both a rectangular loaf pan (4.7 in. x 7.8 in. x 5.1 in.) and a square loaf pan (4.7 in. x 5.3 in. x 5.1 in.). I’ll talk more about this below.
- KitchenAid Artisan Series (5 QT, 325 watts; I do not recommend the bowl-lift Professional Series with a spiral hook unless you double the rectangular loaf recipe)
- C-dough hook
- Digital kitchen scale* (I use this and LOVE it after trying three other brands)
- Large bowl
- Dough scraper (I use this)
- Rolling pin (I use this)
- Mister (for round-topped loaf)
- Wire rack
- Bread knife (I use this)
* Please weigh your ingredients with a kitchen scale as precise measurement is crucial for the success of this recipe. I strongly discourage using a cup or volume measurement.
Nice-to-Haves
From Your Kitchen
Where to Buy the Right Japanese Loaf Pan
A typical shokupan pan is slightly larger in size and taller in height than the regular American Pullman loaf pan. If you don’t have any issues with that, then get this loaf pan with a lid (4.2 in. x 7.7 in. x 4.4 in.) on Amazon. You can still follow my rectangular loaf recipe exactly if you use this size.
To make shokupan following the standard Japanese size, I recommend this 1.5 kin loaf pan (4.7 in. x 7.8 in. x 5.1 in.) and/or this 1 kin loaf pan (4.7 in. x 5.3 in. x 5.1 in.) from Asai Shoten (浅井商店) in Japan.
The loaf size in Japan is measured in “kin (斤),” an old Japanese unit for measuring bread weight. The British-style round-topped bread was 1 pound (450 g) back then and it was called “1 kin.”
Now, how do you get a loaf pan shipped to your home from Japan?
I have written an extensive post about Japanese loaf pans and how to order them from Japan.
How to Make Black Sesame Milk Bread (Shokupan)
You can make shokupan with very simple ingredients and procedures. I’ve made my fair share of shokupan, but there’s still plenty to learn and I may not know all the answers. If you wish to build a strong foundation and knowledge on how yeast bread works, I encourage you to take bread-making classes from my instructor Mariko.
Ingredients You’ll Need
(Baker’s percentages are in parentheses)
- Warm water (71%): 104ºF or 40ºC
- Sugar (6%): I use organic cane sugar from Costco
- Instant yeast (2%): I use Fleischmann’s® bread machine yeast or RapidRise® instant yeast
- Kosher salt (2%)
- Honey (3%): I use multi-floral and clover honey from Trader Joe’s, but you can use other types
- Bread flour (100%): I use King Arthur bread flour, which is 12.7% protein–a whole point higher than other US brands
- Skim milk powder or nonfat dry milk powder (6%): Skim milk powder and nonfat dry milk are different. Skim milk powder has 34% in protein while nonfat dry milk powder has 18%. In Japan, shokupan is made with skim milk powder. Here in the US, you can only find nonfat dry milk powder and I’ve been using Bob’s Red Mill’s to make shokupan.
- Unsalted butter (7%): I use Kerrygold. Please DO NOT use salted butter
- Black sesame seeds
Substitutions:
- To substitute active dry yeast for instant yeast: Some online resources say to use the exact same amount as instant dry, while others say to use 25% more active dry. So please give it a try and adjust. Proof active yeast by dissolving it in a portion of the warm water (105º-110ºF or 41-43ºC) from the recipe before adding to the rest of the ingredients.
- Use the following yeasts interchangeably: Instant yeast = RapidRise® yeast = quick-rise yeast = bread machine yeast.
- Can I substitute bread flour with all-purpose flour? No, please do not substitute if you want to make a proper shokupan loaf. You will need the higher percentage of protein in bread flour for the dough to rise high enough.
- Vegan milk powder option? I haven’t tried alternatives, but Mariko had tried coconut milk powder and it worked. Avoid soy milk powder as the dough does not rise well.
- Vegan butter option? Please use unsalted vegan butter such as Miyoko’s.
Overview: Bread-Making Steps
Total time: 3 hours and 35 minutes (+ cooling) / Active time: 1 hour and 10 minutes
- Measure the ingredients: 10 minutes (+ 10 minutes for the yeast to bloom)
- Knead the ingredients: 15 minutes
- The first rise (bulk fermentation): 40 minutes
- Divide and roll the dough: 15 minutes
- Bench rest: 15 minutes
- Shape the dough: 20 minutes
- The final rise (proofing): 60 minutes
- Bake: 30 minutes
- Cool: 3 hours
5 Important Tips for Milk Bread Making
There’s a lot of information to take in but don’t let it deter you from giving shokupan a try. I have beginners who have tried making the classic milk bread with success! The tips are here to equip you with the basic science of bread-making so you’re off for a good start.
Tip 1: Create a Warm Environment for Your Dough
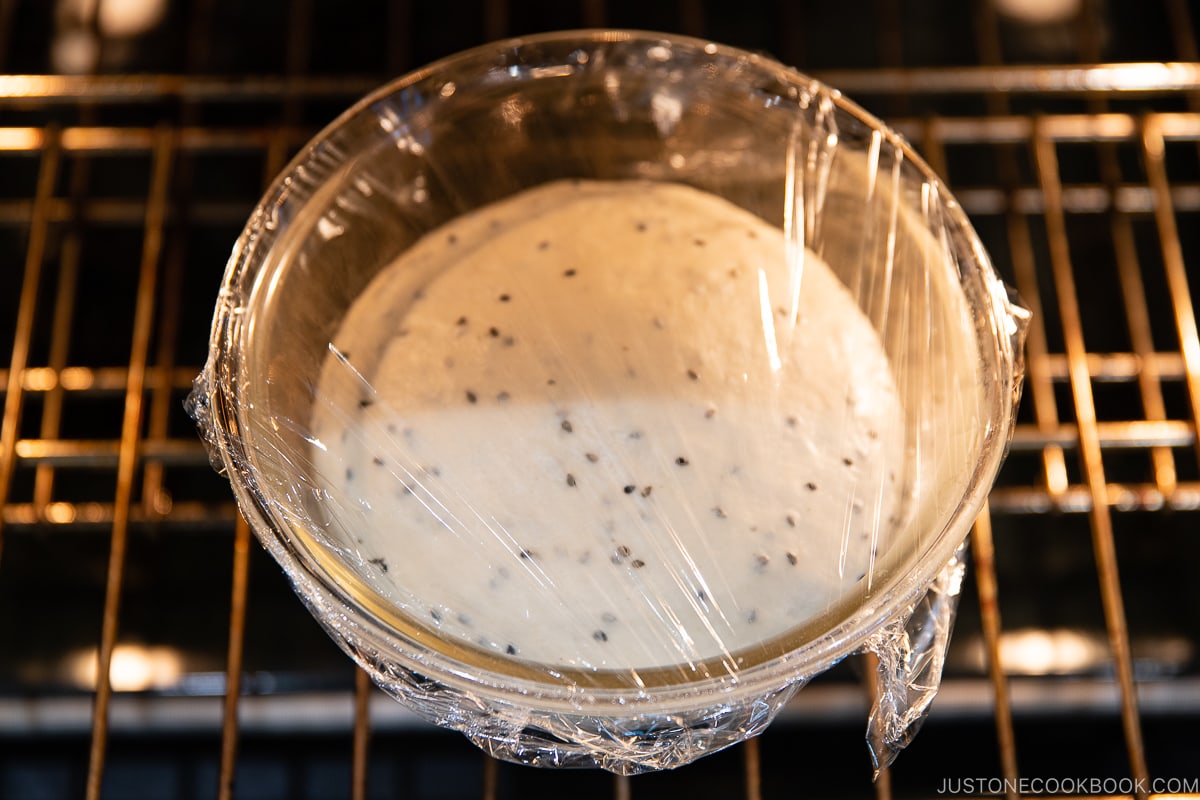
The optimal temperature for fermenting and proofing bread dough is 86-95°F (30-35°C) degrees.
To create a warm environment, place a baking pan or dish of boiling water on the lower rack of the oven and place the bowl of dough on the upper rack. With the door closed, the oven stays warm and humid. Sometimes, even with just the light on, it gets nice and warm.
Dough proofed at temperatures lower than 86ºF (30°C) will take longer to ferment or will go dormant. At higher temperatures, the yeast will expand more quickly than the gluten structure. If this happens, it won’t be able to keep up with the fermentation and the air bubbles will collapse.
Also, avoid placing the dough in direct sunlight in the summertime as it gets too hot and develops a crust, even though it may seem like a warm location for proofing.
Tip 2: Use the Windowpane Test
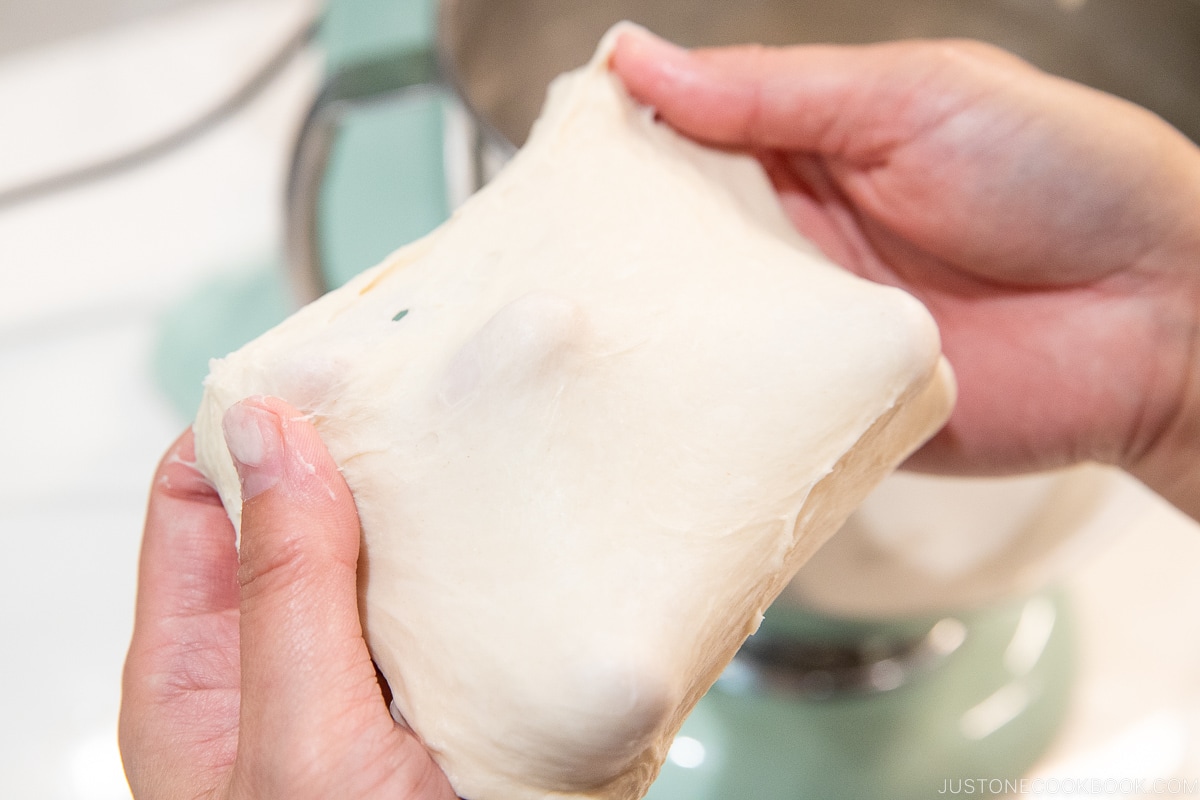
The more you knead the dough, the stretchier it gets. But how do you know when to stop? That’s where the windowpane test comes in handy. It’s a useful way to check the elasticity of the dough, and here’s how to do it:
- Pull off a small bit of dough. Gently stretch it into a square with your fingers.
- Keep on stretching until it becomes a thin film in the middle.
- Check to see that:
- it’s a super-thin membrane;
- light can pass through; and
- there’s no tearing.
- If you’ve got all 3 points, then the dough passes the windowpane test!
Now you know that your dough is properly kneaded and the gluten is well developed. Dough with the right elasticity can hold gases in while it rises and stretches even more as it expands.
Tip 3: Create a Smooth and Taut Surface
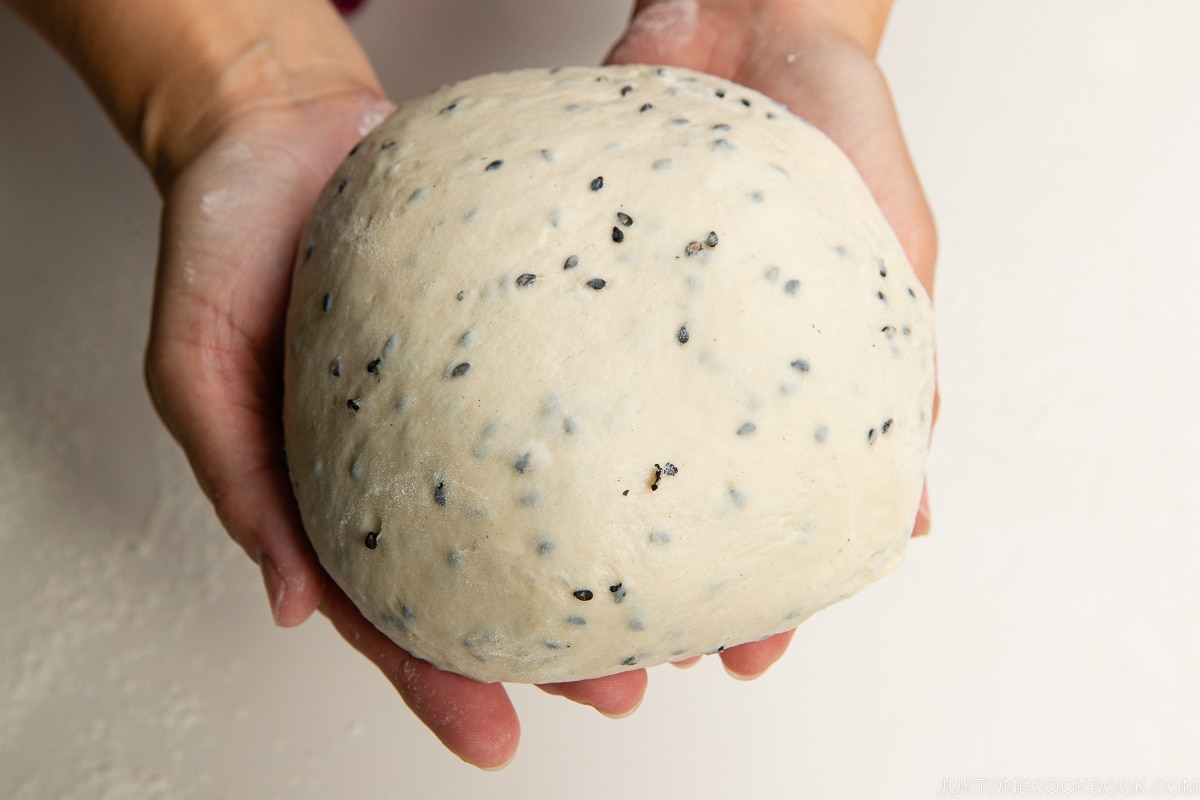
When you roll and shape the dough, try to create a smooth, slightly taut skin on the outside.
When you have a smooth, taut skin, the carbon dioxide generated during fermentation will not escape. As a result, the bread becomes plump and voluminous, and the baked shape is beautifully finished.
Try one of these two methods for creating a smooth, taut dough ball:
- Place the dough on a non-floured surface. Place both of your hands behind the dough and drag the dough ball along the surface toward your body. The bottom of the dough sticks to the dry surface, creating tension and tightening the ball. Keep the dough ball upright and don’t allow the top of the dough to roll over as you pull (see this video). Rotate the ball a quarter turn and perform another gentle drag toward your body. Continue rotating and dragging a few more times until the dough is sufficiently taut and uniformly round.
- Using both hands, gently pull the sides of the dough to create tension on the outside and tuck the ends underneath the ball.
Tip 4: Always gently handle the dough as if it is a baby!
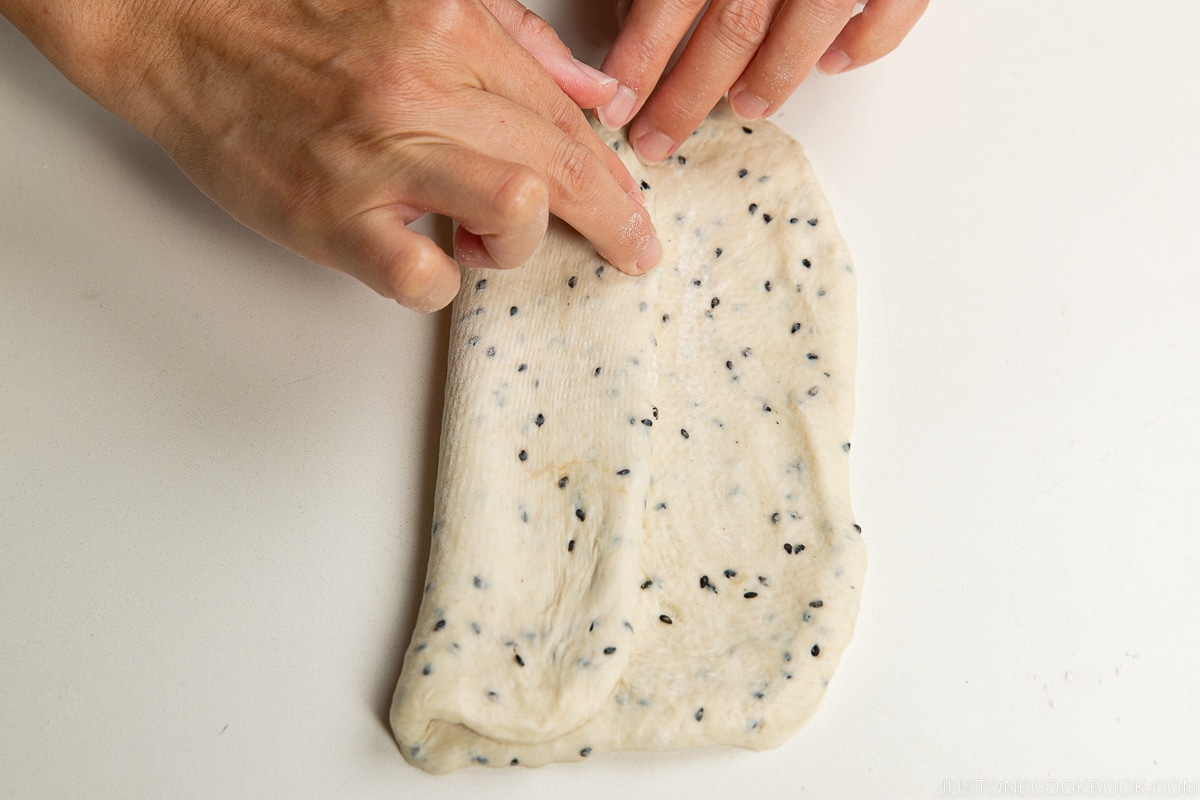
Always handle the dough with slow, gentle movements. No pulling, no stressing the dough. You would damage it if you pull or tear the dough while you divide, roll, and shape the dough. With your gentle care, your bread will be even more delicious.
Tip 5: Keep the Desired Dough Temperature (DDT) in Mind [Advanced]
The key to achieving consistently great results in your bread baking is to bring your dough to the desired dough temperature (DDT), no matter what season or kitchen condition you are in. I’ll discuss DDT in the next section.
The dough temperature after kneading should be 79-82ºF (26-28ºC) and not lower or higher than this temperature. The yeast will be most active at 82-95ºF (28-35ºC) during the First Rise (or Bulk Fermentation), so your goal is to bring your dough to the DDT by the time you finish kneading.
If your dough temperature is higher than 82ºF (28ºC), let the dough slowly rise for the First Rise, instead of putting it in a Proof setting (100ºF/38ºC) or placing it in a warm place. You do not want to overproof the dough.
Baking in the summertime can be challenging as the dough gets warmer than it should be. I will cover this topic later in the post.
Expert’s Tip: The Desired Dough Temperature (DDT)
The temperature of the dough affects the rate of fermentation and, in turn, the flavor and texture of the finished product. When the season changes, the temperature in your kitchen also changes. Even if you’re doing everything the same, the temperature difference could affect the result of your bread.
Therefore, the key to achieving consistently great results in your bread baking is to bring your dough to the desired dough temperature (DDT), no matter what season or kitchen condition you are in. At professional bakeries, measuring the temperature of the ingredients is as important as weighing the ingredients. The DDT varies depending on the type of bread.
For shokupan, the DDT range at the end of kneading is 79-82ºF (26-28ºC).
Maintaining the temperature range will lead to the best flavor and rise in your shokupan. The yeast activity slows down at around 113ºF (45°C) and dies when the temperature rises above 140ºF (60°C).
Professional bakers use a simple mathematical formula to calculate the temperature of the one variable they can control: the water. Because water accounts for a large proportion of the ingredients in making shokupan, having the right water temperature to start is the most important factor to bring the dough to the DDT. The formula is:
(DDT x 3*) – room temperature – flour temperature – friction factor** = water temperature
Examples at my kitchen in San Francisco:
- Summer in ºF: (80 x 3*) – 72 – 70 – 14** = 84ºF (29ºC)
- Winter in ºF: (80 x 3) – 65 – 70 – 14 = 91ºF (33ºC)
- Summer in ºC: (27 x 3) – 22 – 21 – 8** = 30ºC (86ºF)
- Winter in ºC: (27 x 3) – 18 – 21 – 8 = 34ºC (93ºF)
*The number of variable temperatures (room, flour, and friction) other than water temperature that affects dough temperature
**The friction factor in baking represents the amount of heat transferred to bread dough during mixing and kneading. Friction can raise the temperature of your dough significantly, so it needs to be taken into account when making dough-temperature calculations. The amount of heat generated by the specific mixing method varies.
- For stand mixer kneading, use a temperature between 11ºF and 18ºF (6°C-10°C) – I used 14ºF (8ºC) as the friction factor.
- For hand kneading, use a temperature between 0ºF and 9ºF (0°C-5°C).
I used the professional bakers’ friction factor for shokupan, which I found on multiple Japanese resources. The range was given because it varies depending on the machine, the temperature of your palm, and the amount of time you knead. For a temperature difference conversion, you multiply ºC by 1.8 (9/5) to get ºF, or you multiply ºF by 0.55 (5/9) to get ºC. Thus a mixer friction factor of 14°F is equivalent to 8°C, not -10°C.
How to Troubleshoot
- If the dough temperature is lower than DDT: Let the dough rise for a little longer than the time specified in the recipe in a warm place.
- If the dough temperature is higher than DDT: You can either let the dough rise in a cool place for a short time or lower the dough temperature by putting it in the refrigerator for about 1-2 minutes, then taking it out and re-rolling it so that the temperature of the dough is uniform. When the dough temperature is high, it is easy to over-proof, resulting in bad flavor and fast deterioration.
Baking in Summertime
When you bake in hot summer weather, you have to make sure the dough will not over-proof. When the dough rises properly, the bread will have a good smell, taste, and texture. When the dough over-rise, it will not yield tasty bread.
Here are 5 things you can do to prevent the DDT (Desired Dough Temperature) from rising too high on a hot summer day.
- Reduce the room temperature (use air conditioning to keep the room temperature cool).
- Use cold water, and possibly use less water if the humidity is high.
- Refrigerate flour before using.
- Refrigerate baking tools (stand mixer bowl, etc).
- Reduce the amount of yeast just slightly.
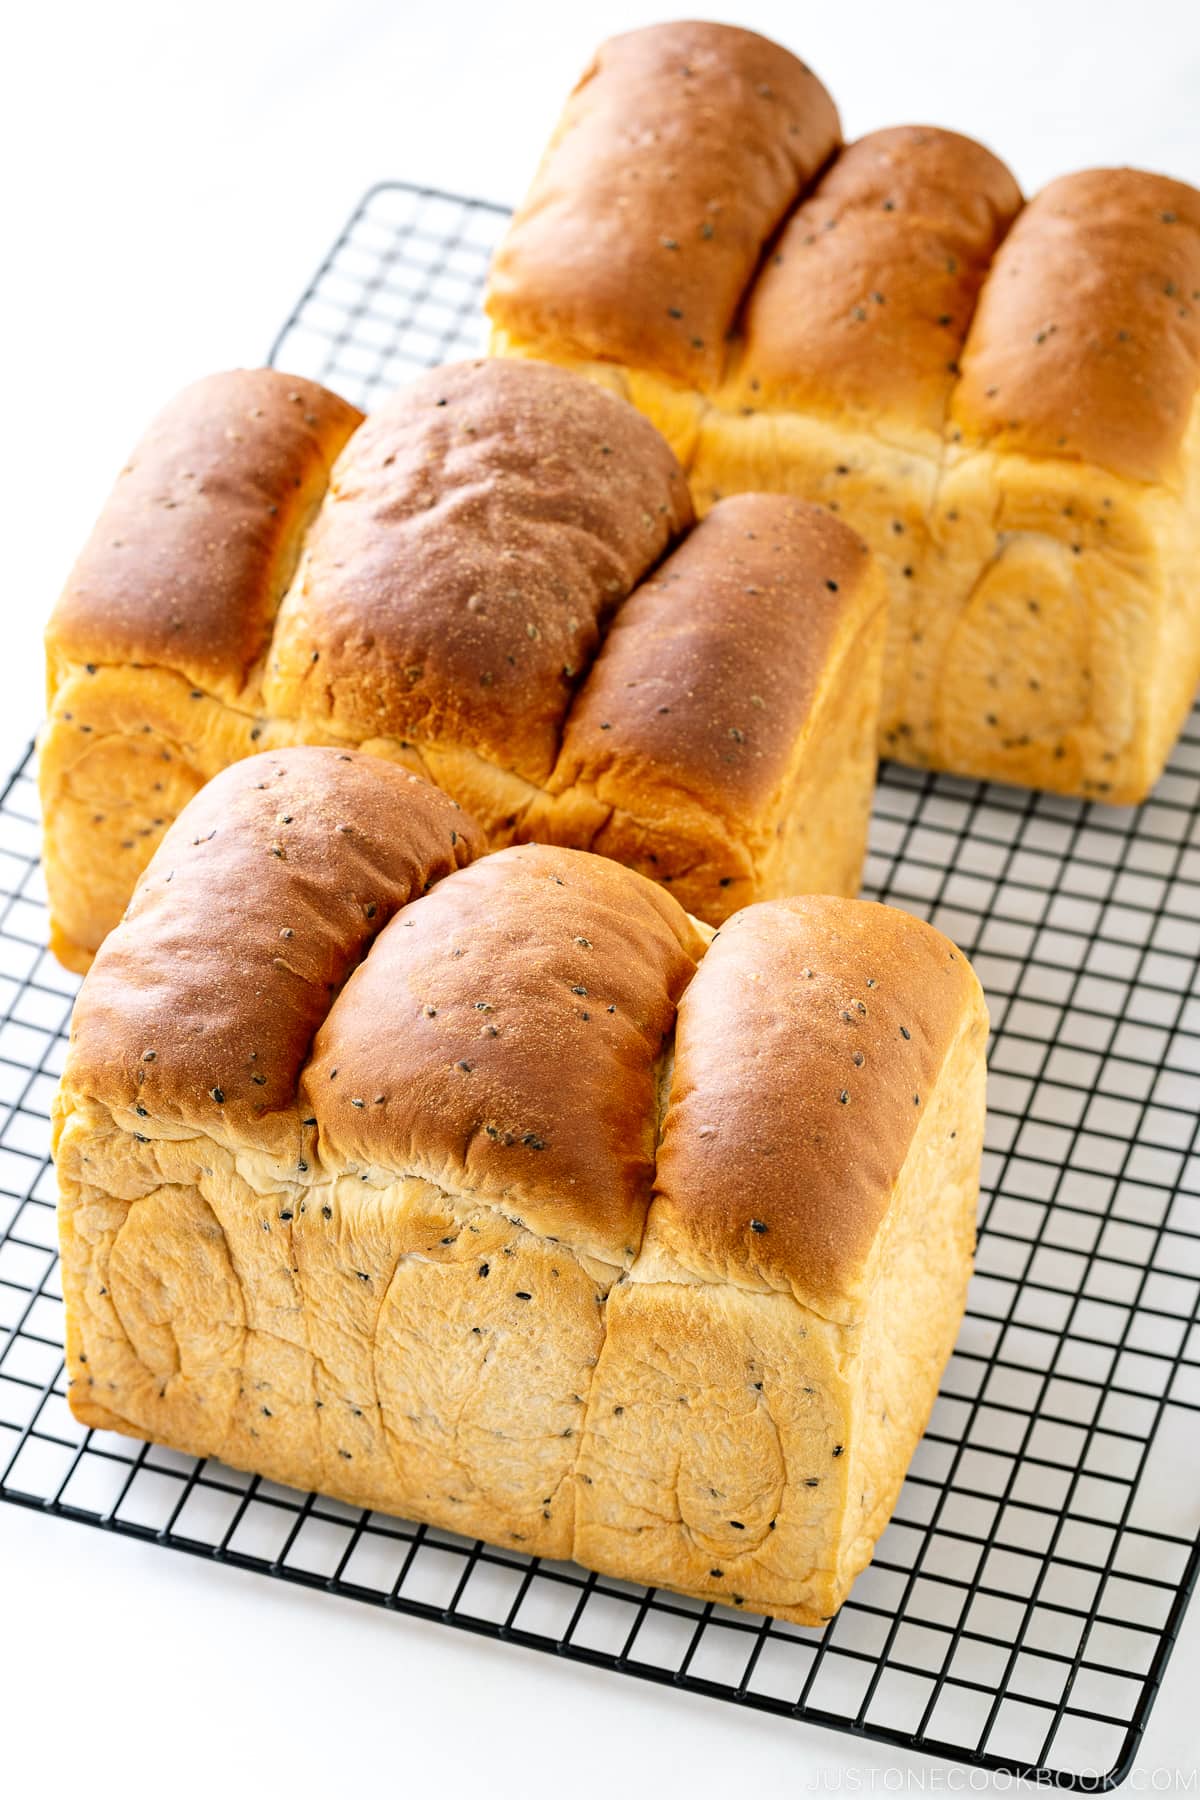
How to Store Shokupan
- At room temperature: This is the best storage method if you consume the bread within 1-2 days. Put your loaf in this plastic bag and keep it in a cool place out of direct sunlight. I usually cut slices off the loaf as needed. On warm days, consume it within a day or store it in the freezer (make sure to slice first before freezing).
- In the freezer: If you can’t consume your bread within a day or two, freezing is the best choice. The bread can stay fresh for up to 2 weeks. Cut the loaf into slices before freezing. It’s typically recommended to wrap the individual slices in plastic wrap to avoid odor absorption and freezer burn; however, I try to minimize plastic use, so I do not individually wrap in plastic. It’s best to enjoy it soon.
- In the refrigerator: The cold air dries the bread; hence, refrigeration is not the best method.
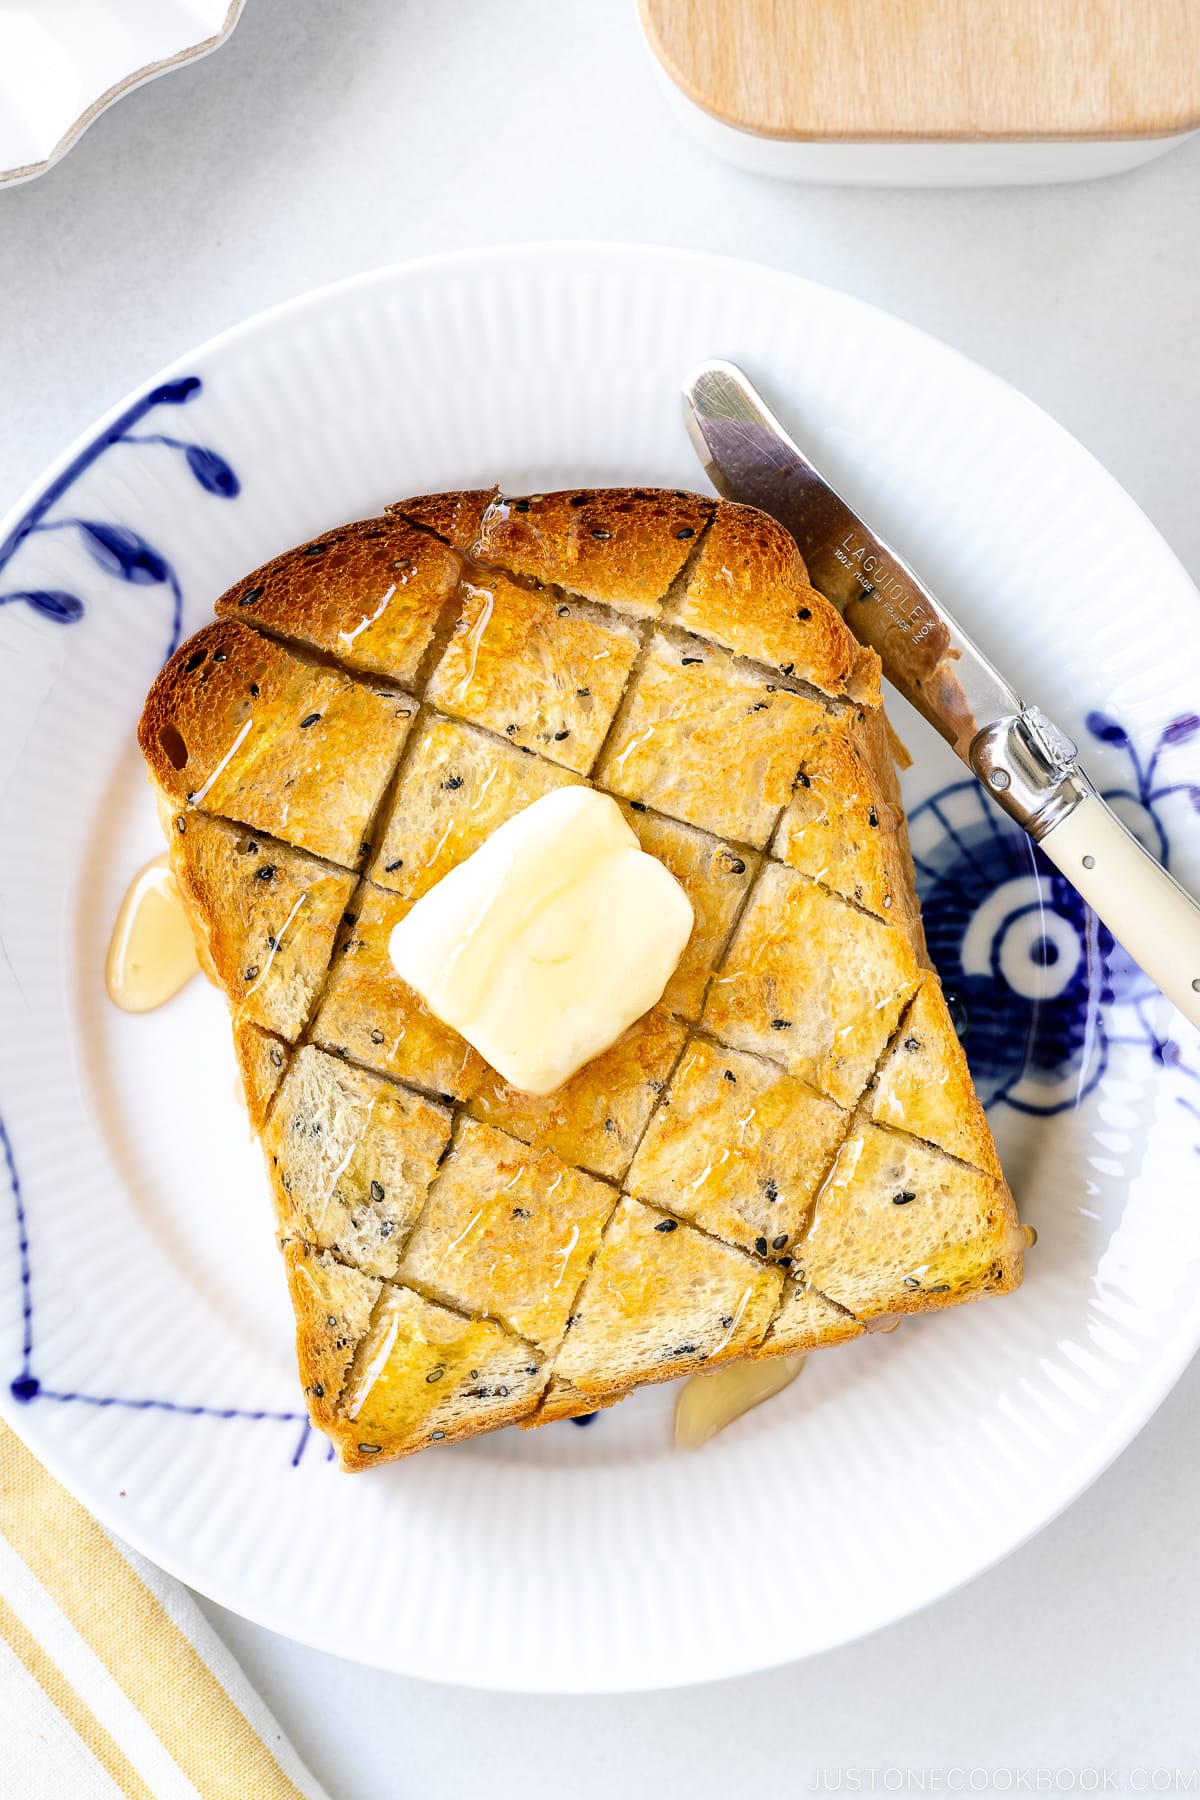
Best Ways to Enjoy Black Sesame Shokupan
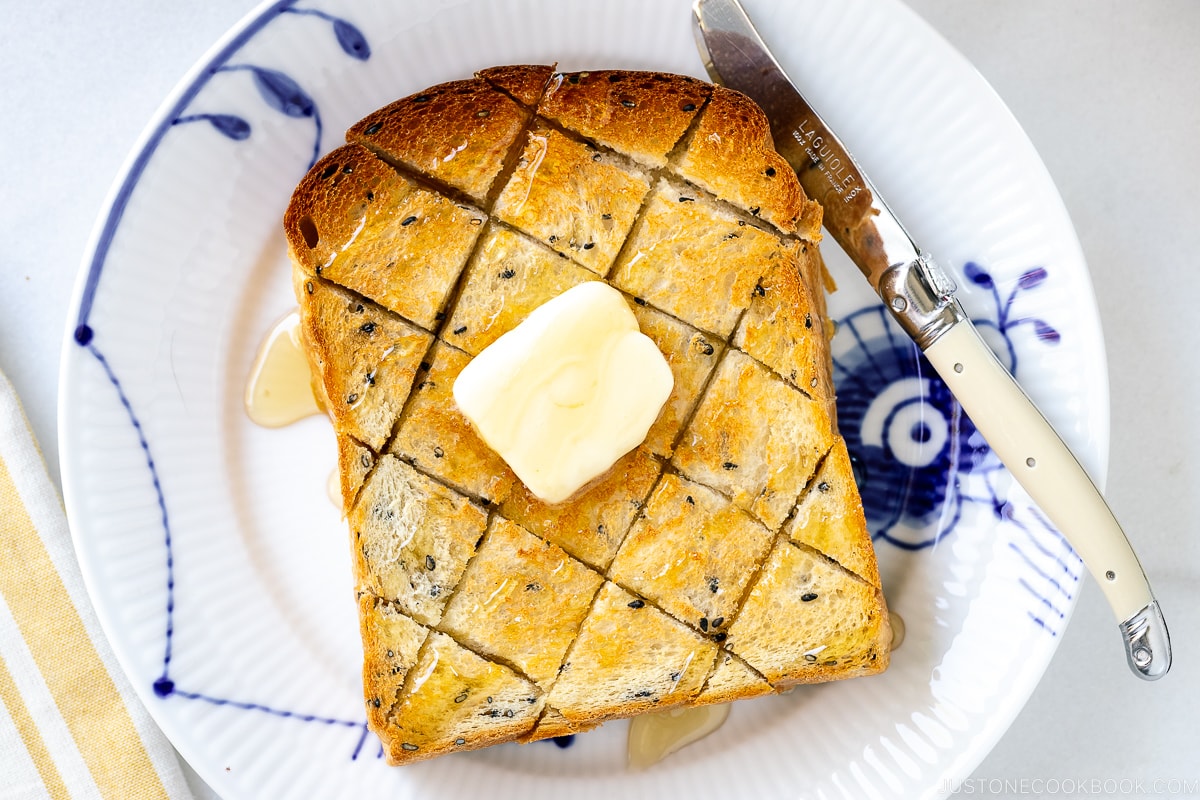
- Simple toast: Score the shokupan slice in a pattern (see above) and toast it. Then, place a pat of butter on top and drizzle honey. If your bread was frozen, mist some water on the slice and toast it in a preheated oven.
- Sandwiches: Japanese Sandwiches, Tamago Sando (Egg Salad Sandwich), and Wanpaku Sando.
Wish to learn more about Japanese cooking? Sign up for our free newsletter to receive cooking tips & recipe updates! And stay in touch with me on Facebook, Pinterest, YouTube, and Instagram.
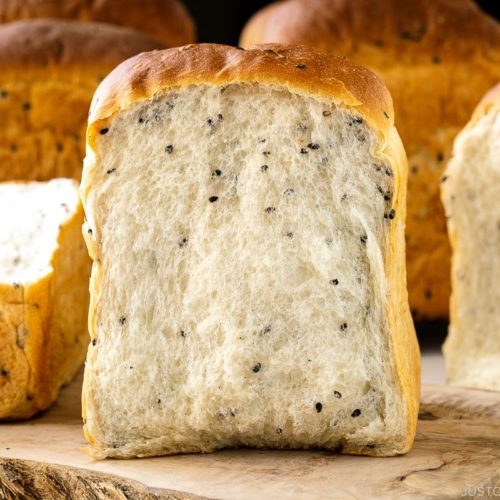
Black Sesame Milk Bread (Shokupan)
Ingredients
For 1 Rectangular Shokupan Loaf (1.5 kin (斤) size)
For 1 Square Shokupan Loaf (1 kin (斤) size)
Prevent your screen from going dark
Instructions
Before You Start
-
Shokupan Loaf Pans: The rectangular loaf pan is 4.7 x 7.8 x 5.1 inches (12 x 20 x 13 cm) and can hold 3100 ml. The square loaf pan is 4.7 x 5.3 x 5.1 inches (12 × 13.5 × 13 cm) and can hold 2070 ml. I have written an extensive post about Japanese loaf pans and how to order them from Japan. If you‘re not particular about the size and shape, you can use this 1 lb loaf pan on Amazon and follow the recipe for the rectangular loaf.
-
Stand Mixer: Please note that my instructions below are for a KitchenAid 5-QT Artisan Series Stand Mixer (325 watts). If you‘re using a KitchenAid Classic Series mixer, do not double the recipe as the 275-watt motor is not strong enough. If you‘re using a KitchenAid Professional Series mixer with a spiral dough hook, you must double the rectangular loaf recipe to succeed, as there won‘t be enough dough to engage the hook otherwise. With twice the dough, you must knead up to 1½ times longer at each step (as noted in the instructions). If you have a different brand of stand mixer, follow my steps the best you can to achieve a dough with the correct texture that passes the windowpane test. Please see the blog post for more details.
-
Hand Kneading: I hope this video is helpful for the kneading technique to use.
-
Oven Rack: Set the oven rack to a lower position where the top edge of your loaf pan is 6 to 7 inches (15–18 cm) away from the top heating element. This will allow enough space for the bread to rise during baking, especially if you plan to make a round-topped milk bread. Don’t get closer than 6 inches or the top may brown too fast.
-
To Create a Warm Environment for Bulk Fermentation: If your oven has a Proof setting, turn it to 100ºF (38ºC). Tip: If your oven doesn‘t have a Proof setting, place small baking dishes of boiling water at the four corners on the lower-middle rack. Then, place your dough in a bowl in the center of the rack and close the door. The steam and heat from the boiling water will create a warm environment for bulk fermentation. There is plenty of online information on different ways to proof bread dough, such as using an Instant Pot (use the Yogurt function on Low or use the temperature setting). During the summer when humidity is high, you may not need to do this.
To Make the Dough
-
Gather all the ingredients. Cut 25 g unsalted butter (or 17 g unsalted butter for 1 square loaf) into small cubes; I used a pair of scissors. Tip: Precise measurement is extremely important for this recipe; therefore, please weigh your ingredients with a digital kitchen scale. I strongly discourage measuring by volume.
-
In a large bowl, combine 250 g warm water, 20 g sugar, 7 g Diamond Crystal kosher salt, and 10 g honey (or 167 g warm water, 14 g sugar, 4.5 g Diamond Crystal kosher salt, and 7 g honey for 1 square loaf). Mix together.
-
Then, add 7 g instant yeast (or 4.7 g instant yeast for 1 square loaf) and whisk it all together. Set it aside in a warm place for 10 minutes. Meanwhile, prepare the dry ingredients.
-
You want to see bubbly foam on the surface of the yeast mixture. If you don’t see any, maybe your yeast is old or the environment is not warm enough; wait another 5 minutes to see if any bubbles develop.
-
In a stand mixer bowl, combine 350 g bread flour and 20 g skim milk powder or nonfat dry milk powder (or 235 g bread flour and 14 g skim milk powder or nonfat dry milk powder for 1 square loaf). Mix it together with a silicone spatula or dough scraper.
-
Make a well in the middle of the flour mixture. Once you confirm the foamy surface on the yeast mixture, pour it into the well of the flour mixture, scraping every bit of the liquid with the silicone spatula or dough scraper. Set aside the yeast mixture bowl.
-
Using the silicone spatula or dough scraper, mix the dry and wet ingredients until combined.
-
Lightly grease the empty yeast mixture bowl with neutral oil. Use a paper towel to wipe off any excess oil from the bowl and your oily fingers. We do not want a pool of oil in the bowl. Set it aside; you’ll be putting the dough ball in it later.
To Knead the Dough Using the Stand Mixer
-
Warning: KitchenAid does not recommend kneading dough at settings higher than Speed 2. However, we can’t achieve a perfect texture without kneading aggressively. Hold your stand mixer down with your hand(s) when you’re kneading at Speed 6, and keep an eye on it at all times. Do not walk away. Don’t take this warning lightly, as my instructor’s mixer fell off the countertop onto the kitchen floor twice when she stepped away for just a few seconds. Please use it at your own discretion.
-
Set up the stand mixer with a dough hook attachment. Knead the dough on Speed 2 for 2 minutes (or 3 minutes if making double the rectangular loaf recipe using the Artisan or Professional series mixer). This is just to get started. The ingredients should be well combined after this step.
-
Next, increase the speed and knead the dough on Speed 4 for 8 minutes (10 minutes for double). After 8 (or 10) minutes, stop the mixer and check the texture of the dough. It should be a lot smoother, shinier, softer, and thinner when it’s stretched. At this stage, the dough is still attached to the bottom of the mixer bowl. Tip: These times are only a guideline. Check the condition of your dough to know when to move on to the next step. Tip: If your stand mixer is getting hot, place a cold damp towel on top of the mixer to cool while it kneads.
-
Now, knead the dough on Speed 6 for 2 minutes (2 minutes for double). From here, you MUST hold down your stand mixer with your hand(s) since the machine will shake and move, and it could possibly fall off the countertop onto the floor. Japanese milk bread requires aggressive kneading to get that soft, tender texture. The goal here is to develop the gluten (elasticity) by lengthening and stretching the gluten strands in the dough.
-
At this stage, the dough will start pulling away from the bottom of the bowl and eventually become a solid ball shape. The mixer will shake and wobble as the dough bangs around the sides of the bowl. Again, hold your stand mixer to keep it from falling and monitor it at all times.
-
Add the butter cubes to the dough. Knead the dough again on Speed 2 for 2 minutes (3 minutes for double), or until you can no longer see any streaks of butter.
-
Then, knead the dough on Speed 6 for 4 minutes (4½ minutes for double). After kneading on Speed 6, stop the mixer. The dough should look really shiny, silky, soft, and smooth (not sticky). When you lift the dough hook, it should pick up all the dough in one piece, separating easily from the bottom of the bowl. Tip: If the dough becomes slack and gooey, you‘ve kneaded for too long.
The Windowpane Test
-
Now, it’s time for the windowpane test. Either pull on a part of the dough or tear off a small piece. Hold the dough in both hands and gently pull it into a square with your fingers. It should be strong yet elastic, smooth, and shiny. If it‘s strong enough to stretch to a super-thin membrane without tearing and light can pass through the center, your dough passes the test. If it doesn’t stretch or it tears too easily, knead it again on Speed 6 for 2–3 minutes and test again.
-
If you are checking the temperature of the dough, insert an instant-read thermometer into the center of the dough. The dough temperature should be 79–82ºF (26–28ºC) at this stage and not lower or higher than this temperature. The yeast will be most active at 82–95ºF (28–35ºC) during the bulk fermentation. If your dough temperature is higher than 82ºF (28ºC), let the dough slowly rise for the First Rise (Bulk Fermentation), instead of putting it in a Proof setting (100ºF/38ºC) or placing it in a warm place. You do not want to overproof the dough.
To Slam and Fold
-
Lightly dust the work surface and your hands with flour to prevent sticking. Scrape the dough from the bowl with the silicone spatula or dough scraper and place it on the work surface. From this point, make sure to keep one smooth surface on your dough ball at all times. My nice smooth surface is currently on the bottom of the dough.
-
Now, pick up the dough ball, keeping the smooth side up. Then, slam the smooth side onto the work surface. Bang!
-
Then, hold one edge of the dough with your fingers in the 12 o’clock position and fold it over to the other side at the 6 o’clock position, revealing the smooth surface. Now, pick up the dough with the smooth side up.
-
Once again, slam the smooth surface of the dough onto the work surface. Bang! Now, pick up the edge of the dough at the 9 o’clock position and fold it over to the opposite side at the 3 o’clock position, revealing the smooth surface. Again, pick up the dough with the smooth side up. Repeat this “slam and fold“ process 5 times in total.
-
Finally, go back to the dough and fold it over one last time. Pick it up and pull the edges of the dough from all sides to create a smooth, taut skin. Tuck and pinch the edges underneath to hide them at the bottom. Put the dough ball in the greased bowl and cover it with plastic.
The First Rise (Bulk Fermentation)
-
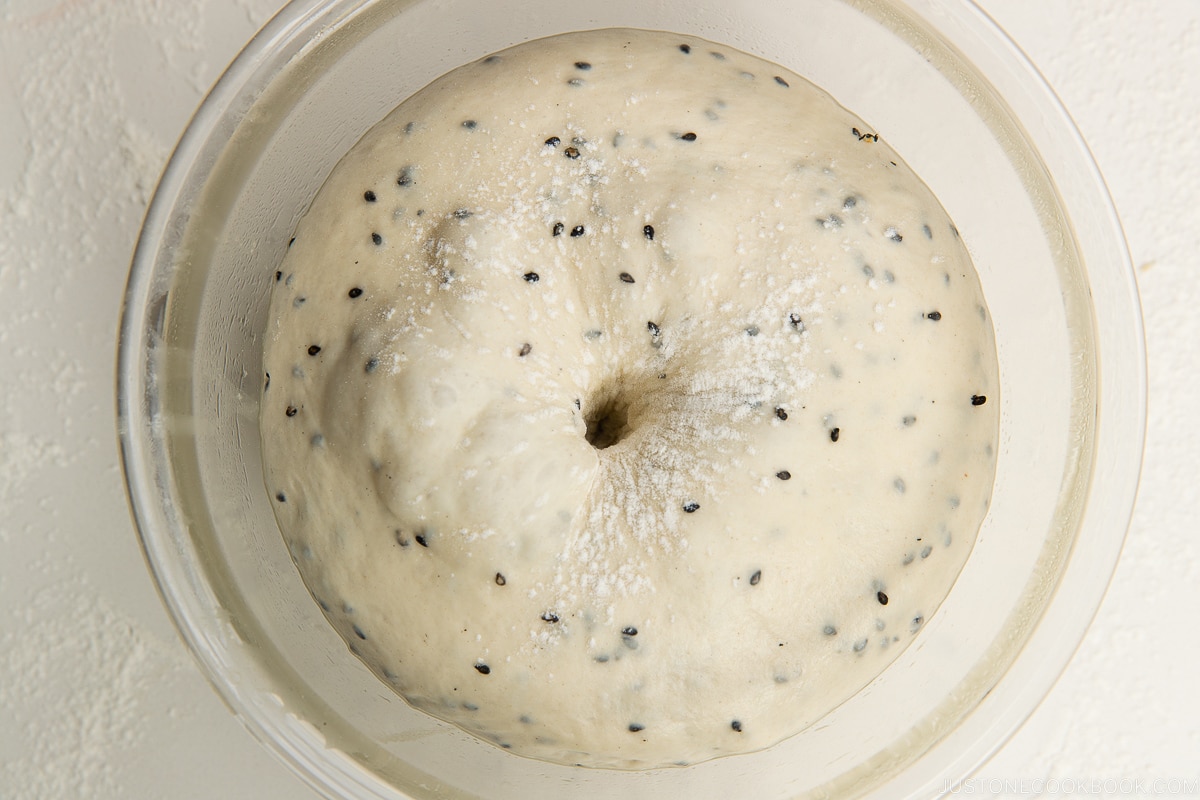
Let the dough rise for 40 minutes. The dough will become 3 times bigger in size. If you live in a cooler climate, it may take longer (1–1½ hours). I use the Proof setting on my oven at 100ºF (38ºC). Please see the “Before You Start“ section of the recipe for my proofing tips. The picture below is after 40 minutes.
To Use the Finger Test
-
Once the dough has tripled in size, uncover and dust some flour on top. Use your index finger to poke the middle of the dough. If the hole does not close up, it’s ready. If the dough closes up immediately, proof the dough a little longer.
To Deflate the Dough
-
Invert the dough bowl to release the dough onto your work surface. Using your fingers, gently press down and deflate the dough. Remember to keep one smooth surface on your dough at all times. My smooth surface is currently on the bottom of the dough.
-
Collect and press all the edges into the middle, flip the dough, and form a round shape, tucking any loose edges underneath. Put the dough on a kitchen scale and remember the total dough weight.
To Divide the Dough
-
Transfer the dough to the working surface. Divide it with the dough scraper into 3 equal pieces and weigh each piece with a digital scale. For 1 square shokupan loaf, divide it into 2 equal pieces.
-
If you have a piece that‘s bigger than the others, tear off some dough from the edge, keeping its smooth surface intact. Attach the torn dough to the edge of a piece that‘s smaller than the others.
-
Form each piece into a ball with a smooth, taut skin: Hold the dough with the smooth surface on top. Gently pull and tighten the dough down from all sides to create tension on the outside. We want all three dough balls to rise equally, so limit the pulling action to roughly the same for each ball, about 3–4 times total. Tuck and pinch the loose dough at the bottom. Place the dough on the work surface and repeat this process for the rest of the pieces.
-
Alternatively, you can place the dough on a non-floured surface. Place both of your hands behind the dough and drag the dough ball along the surface toward your body. The bottom of the dough sticks to the dry surface, creating tension and tightening the ball. Keep the dough ball upright and don‘t allow the top of the dough to roll over as you pull (see this video). Rotate the ball a quarter turn and perform another gentle drag toward your body. Continue rotating and dragging a few more times until the dough is sufficiently taut and uniformly round.
The Bench Rest
-
Cover the dough balls with a damp towel and rest the dough for 15 minutes.
-
Meanwhile, using a pastry brush, grease the pan (and the lid, if you‘re making flat-topped shokupan) with butter (or cooking oil spray). It should be a thin coating.
To Shape the Dough
-
After 15 minutes, take out one dough ball, keeping the rest under the damp towel. Gently handle the dough without stressing it. Dust just enough flour so your dough does not stick to the work surface and rolling pin, but not so much that your dough slides around. As you practice, you will know how much flour is just enough.
-
Place the rolling pin in the middle of the dough and press it down. First, roll out the dough away from you, rolling all the way through the top edge. Rolling releases gas in the dough.
-
Next, roll out the dough toward you, rolling through the edge closest to you. If the dough slides around, you dusted too much flour. Next time, reduce the flour. Tip: I love using my nonstick rolling pin (I bought it at the same time as my Japanese loaf pans). You can buy a similar one from Amazon.
-
Pick up the dough and flip it over, and then rotate it 90 degrees. It‘s now laid out in front of you in a horizontal oval shape.
-
Press the four corners of the dough to shape the oval into a rectangle.
-
Place the rolling pin in the middle. Roll out the dough away from you and then toward you, rolling through all the edges.
-
Next, roll out the upper two corners, so they are squared rather than rounded. Then, roll out the lower two corners.
-
Lift the dough to loosen up and pull the four corners to create a nice vertical rectangle. Make sure the dough is an even thickness from the center to the edges. If the edges are slightly thick or have any air bubbles, use the heel of your hand to press down the edges or pop the bubbles. The rectangle should be roughly 18 x 21 cm (7 x 8 inches). Tip: I noticed from my own experience that if I don’t roll out the dough evenly at this stage, it affects the shape when I roll up the dough later.
-
Fold the dough in thirds, starting with the right third. Bring the dough to the left one-third line, lightly and gently pressing the edge down so it stays in place. Tip: If the dough sticks to the work surface, gently detach; do not pull, or else the surface of the dough will not become smooth. Always gently handle your dough with care and do not stress the dough.
-
Next, fold the left third of the dough, overlapping the edge of the right third by two-thirds. The edge of the left third should be slightly past the center line. Press down and seal this edge with your fingers, from top to bottom.
-
Place the rolling pin in the middle. First, gently, without pressing down too much, roll out the dough away from you.
-
Next, roll out the dough toward you. At this stage, the folded dough should have an even thickness.
-
Fold down the two upper corners toward the center line, so the top now looks like a triangle tip. Then, tuck the tip down toward you, making sure it is right in the middle.
-
Start rolling the dough slowly toward you, gently pulling the dough downward as you roll to create a smooth, taut skin, but don‘t roll too tight. Keep rolling all the way to the end, making sure the shape of the roll is even. Tip: Use the same amount of tension when making all of your dough rolls. This helps them rise at the same rate during the final proof and results in an ideal round-topped shokupan shape.
-
Now, pinch the dough at the edge to seal. Keep the rolled-up dough under the damp towel and repeat this process with the rest of the dough balls. Remember which piece of dough you rolled last.
-
Now, place the dough rolls in the shokupan mold, starting with the first two pieces you rolled. Place the first dough roll, seam side down, on one side of the mold. Make sure that 1) the seam is on the bottom, 2) the direction of the swirl goes toward (and not away from) the middle of the pan, and 3) the rolled edge touches the pan‘s side.
-
Now, place the second dough roll on the opposite end of the mold, seam side down. Again, the direction of the swirl should go toward the loaf’s center.
-
Finally, place the last piece of dough you rolled between the first two, seam side down. The direction of the swirl can go either way.
-
Gently press down on the tops of the rolled dough to make them the same height. Cover the mold with plastic.
-
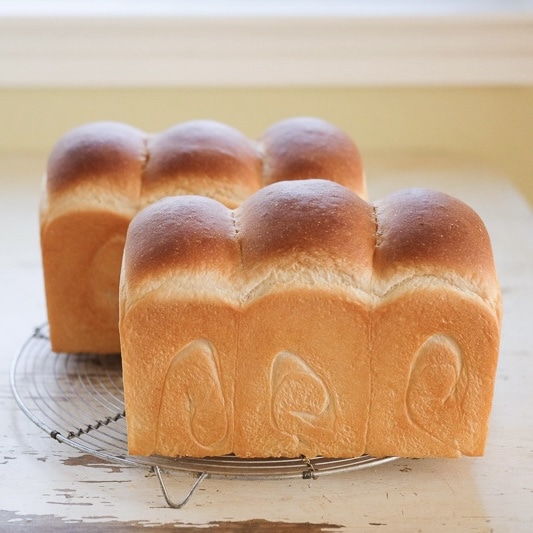
If you are using the square shokupan loaf pan, two rolls should go in just like the rectangular loaf pan (without the middle rolled dough). The picture below is a regular shokupan without black sesame seeds.
The Final Rise (Proofing) and Oven Preheat
-
Place the loaf pan in a warm environment for 1 hour or until the dough has risen to 80–90% of the height of the mold (see the next step). Tip: For the first 30 minutes, I use the Proof mode of my oven. I then take out the mold and place it in a warm area in the house to finish proofing.When you have 30 minutes of proofing time left, start preheating the oven to 425ºF (220ºC). For a convection oven, reduce the baking temperature by 25ºF (15ºC). Tip: My oven usually preheats in 15 minutes; however, it is very important that the oven is thoroughly preheated, so I plan 30 minutes of preheating time.
-
To make a round-topped shokupan (山型食パン), let the dough rise to 85–90% of the height of the mold. When the highest point of the dough touches the plastic wrap, it’s ready to bake. Note: The volume for each shokupan mold is very different. My 90% may not be the same as yours if we use a different mold.
-
To make a flat-topped shokupan (角型食パン), let the dough rise to 75–80% of the height of the mold. Then, remove the plastic and close the lid. If your proof was a bit too long and you exceed 80%, change to a round-topped shokupan. Tip: Don‘t force the lid closed on the dough. Even if the lid closes, the dough will continue to rise in the oven and the lid will get stuck. The picture below is a regular shokupan rolled dough without black sesame seeds.
To Bake the Bread
-
Remove the plastic and spritz the surface of the round-topped shokupan dough with water. Place the loaf pan in the oven and close the door. Immediately lower the heat to the correct baking temperature: For the round-topped shokupan, bake at 385ºF (195ºC) for 30 minutes. For the flat-topped shokupan, bake at 415ºF (210ºC) for 25–30 minutes (in my oven, it’s 28 minutes). For a convection oven, reduce the baking temperature by 25ºF (15ºC). For a square loaf, the baking temperature and time should be the same or slightly less.
-
If you are baking two loaves at the same time, bake 1–2 minutes longer and make sure to have plenty of space between the pans so the heat can circulate. Tip: If the loaf has come out lighter in color, you may also want to increase the oven temperature by 5ºF (2–3ºC) next time. To bake both the flat-topped and the round-topped shokupan together, bake at 400ºF (200ºC). The picture below is two flat-topped shokupan loaf pans.
-
When it’s done baking, take out the loaf pan and drop it 1–2 times on the work surface (I use a grate on the stovetop) to prevent the shokupan from shrinking. This will let the water vapor in the bread escape. Tip: If water vapor remains in the bread, it will weaken the bread’s structure and make it easier to deflate. The sides of the loaf will wilt and bend as well. For the flat-topped shokupan, open the lid carefully. If you struggle to remove the lid, close it and drop the shokupan mold one more time. If you still can’t open it, note that you need to stop the second proof earlier next time. Maybe instead of 80%, try 75%.
-
Give a few thrusts and let the shokupan slide out of the mold onto a wire rack. Let the shokupan cool completely on the wire rack; it may take 2–3 hours. Do not cut or open the loaf while it’s hot; the steam will escape and the bread will lose moisture.
-
After baking, do not wash your Japanese shokupan loaf pan. Simply wipe it off with a paper towel and store it completely dry to prevent rust.
To Serve
-
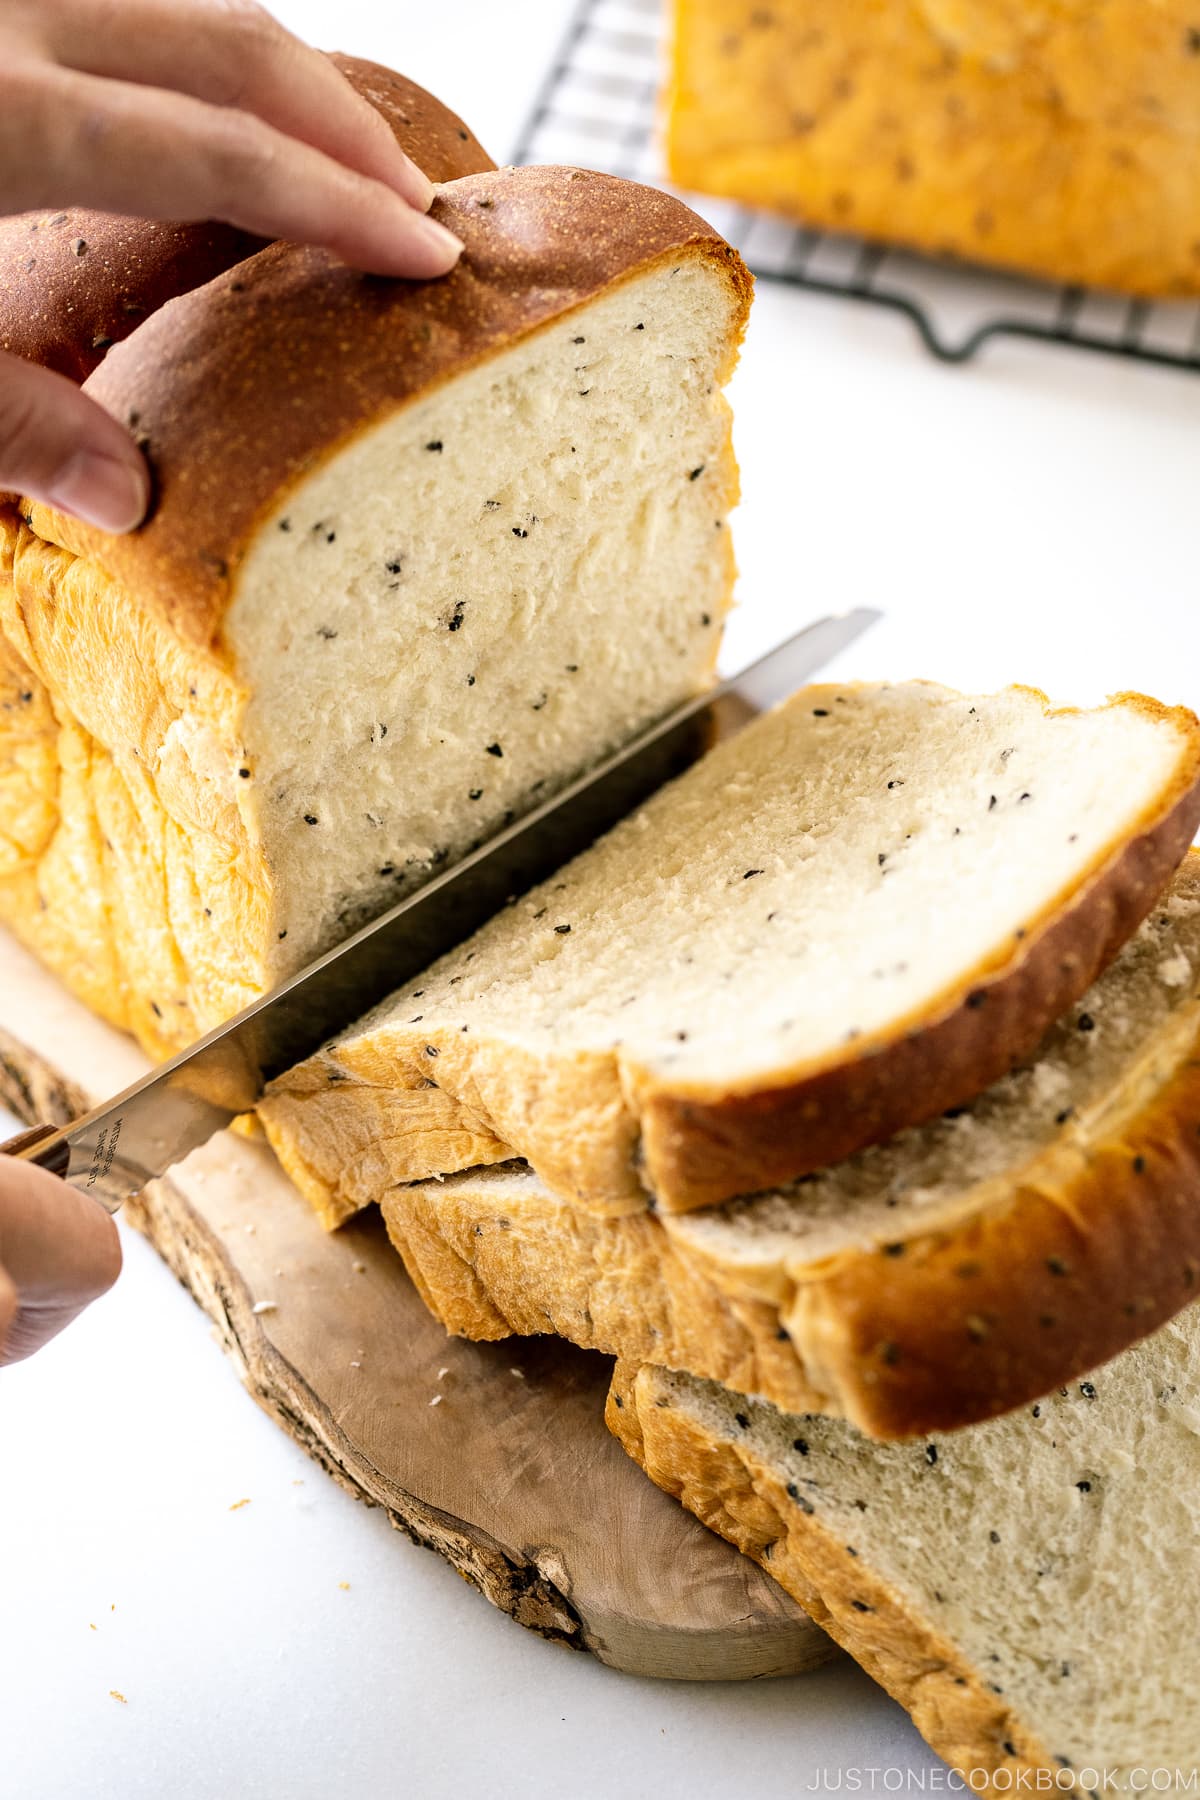
Slice the Black Sesame Shokupan and toast it to enjoy with butter and jam or honey, or use untoasted slices for Japanese-style sandwiches.
To Store
-
If you plan to eat the shokupan within 1 to 2 days, put the whole loaf, completely cooled, in a bag and slice as needed. If you don‘t consume the shokupan within 2 days, slice and freeze the rest for a month to preserve its quality. If you don‘t plan to eat the shokupan within the next 2 days, slice and freeze it. I use these clear plastic bags for loaves.
Nutrition
Nutrition Facts
Black Sesame Milk Bread (Shokupan)
Serving Size
1 1.5 kin (斤) size
Amount per Serving
% Daily Value*
* Percent Daily Values are based on a 2000 calorie diet.

